
TL;DR

Turn the school run and nap time into listening time
- Thousands of audiobooks, podcasts and originals
- Listen on your phone, tablet or Echo — also offline
- Cancel anytime
A weekly routine for cleaning your formula maker involves daily maintenance of milk-contact parts, a thorough deep clean once a week, and periodic descaling. Following manufacturer instructions is key to safe, effective feeding tech.
Feeding your baby with a formula maker simplifies busy mornings but introduces new hygiene challenges. The trick is balancing frequent cleaning with real-life schedules. A straightforward weekly routine can keep your machine safe, functioning well, and free of mold or mineral buildup.
Think of your formula maker as a high-precision coffee machine—regular cleaning isn’t just about appearance. It’s about safety and making sure each bottle is just right. Here’s a practical plan that fits into your busy life, keeping your little one’s feed safe and your machine happy.
Daily cleaning of all milk-contact parts is non-negotiable for baby safety.
A thorough weekly deep clean prevents residue buildup and keeps your machine running smoothly.
Always follow your machine’s manual for descaling and maintenance—avoid shortcuts or unapproved products.
Inspect parts regularly for wear, damage, or mold—replace as needed to maintain hygiene.
High-risk infants may require extra precautions, including sterile formulas and more rigorous cleaning routines.
Formula Maker Cleaning: A Realistic Weekly Routine
Treat your formula maker like a high-precision appliance: clean milk-contact parts daily, complete a thorough reset weekly, and descale the water system when required. The machine’s manual remains the final authority for every step.
“Clean” and “descaled” are not the same condition.
Residue versus mineral buildupThree rhythms, one safer machine
Formula residue, moisture and water minerals create different problems. Matching each problem to the right cleaning rhythm keeps the routine manageable.
Inspect the powder path
Catch fresh splashes, clumps and blocked openings before they affect the next bottle.
- Wipe visible powder or splashes
- Inspect the dispensing opening
- Clean the funnel when prompted
- Handle internal parts with clean, dry hands
Wash milk-contact parts
Funnels, nozzles and mixing chambers receive the most frequent attention because prepared formula touches them directly.
- Wash with hot water and dish soap
- Empty and clean the drip tray
- Refresh water as the manual directs
- Air-dry every removable part
Reset the whole system
A structured deep clean reaches seams, corners and reservoirs that quick daily maintenance can miss.
- Unplug and cool the machine
- Remove approved detachable parts
- Brush narrow openings gently
- Inspect seals, fittings and settings
A repeatable reset from power-down to first bottle
Power down
Unplug and allow heated parts to cool.
Disassemble
Remove only components approved by the manual.
Wash & brush
Use hot soapy water and a dedicated soft brush.
Air-dry
Wait until every surface and seam is fully dry.
Verify
Reassemble, confirm settings and run the required cycle.
Frequency follows exposure
The parts that touch prepared formula need attention most often. The water system may need less frequent service, but mineral buildup still matters for flow, heating and accurate dispensing.
Powdered infant formula is not sterile. Cleaning can reduce contamination introduced through hands, surfaces, water and equipment, but it cannot sterilize the powder itself.
Two jobs with different targets
A spotless exterior does not prove that the internal water path is free of scale. Use the procedure and product approved for your model.
| Maintenance job | What it removes | Typical signal | General cadence | Correct approach |
|---|---|---|---|---|
| ✓Daily washing | Formula film, splashes and fresh residue | Visible powder, stickiness or buildup near the nozzle | Daily or after the manual’s specified bottle count | Hot water, dish soap, thorough rinsing and complete air-drying |
| ✓Weekly deep clean | Residue in seams, corners, trays, lids and detachable assemblies | Hidden buildup, clumps or routine weekly reset date | Once each week | Unplug, disassemble approved parts, brush gently, rinse, dry and verify |
| ~Descaling | Mineral deposits inside the water system | Reduced flow, longer heating, unusual taste or warning light | Often every 1–3 months; water hardness may change this | Use only the approved solution and exact manufacturer sequence |
Do not use bleach, vinegar, harsh chemicals or improvised descaling mixtures unless the machine’s manual explicitly permits them.
Small shortcuts can change the next bottle
Hygiene and dosing accuracy are connected. Residue, moisture or incorrect assembly can interfere with water-to-powder delivery.
Reassembling damp parts
Moisture encourages clumping and microbial growth. Air-dry fully before anything returns to the powder path.
Treating weekly as enough
Milk-contact parts may need daily or bottle-count-based cleaning. Follow the shortest applicable interval.
Ignoring flow changes
Clogs and mineral deposits can affect dispensing. Stop and troubleshoot thin, thick, clumpy or unusual bottles.
Using wet hands in powder
Never reach into the hopper with wet fingers or utensils. Keep powder-contact areas clean and dry.
Forgetting the formula setting
A wrong setting or incorrect assembly may alter concentration. Verify both after every deep clean.
Topping off old water
Refresh the reservoir according to the manual. A clean machine still depends on appropriate water handling.
Every clean bottle begins before dispensing
Machine hygiene is one link in a longer preparation chain. A failure at any stage can undermine the rest.
Extra precautions may be appropriate
Automated formula makers do not sterilize powdered formula. For babies under two months, premature infants, or babies with weakened immune systems, ask a pediatric professional which preparation method is appropriate.
Ready-to-feed liquid formula is sterile until opened and may be recommended in some higher-risk situations. Always follow medical guidance, formula instructions and the machine manual.
Why Daily Cleaning of Milk-Contact Parts Matters More Than You Think
Milk-contact parts are the heart of hygiene in formula makers. They touch formula directly—funnels, nozzles, mixing chambers. If you skip daily cleaning, residue builds up, making bacteria and mold happy. This isn’t just about cleanliness; it’s about preventing potential infections in your baby.
Residue from formula, if left uncleaned, can serve as a breeding ground for bacteria, which can multiply rapidly in warm, moist environments. This increases the risk of your baby being exposed to harmful pathogens like *Cronobacter sakazakii*, which can cause serious illness. Essentially, neglecting daily cleaning diminishes the safety of every feeding, turning a convenient device into a potential hazard.
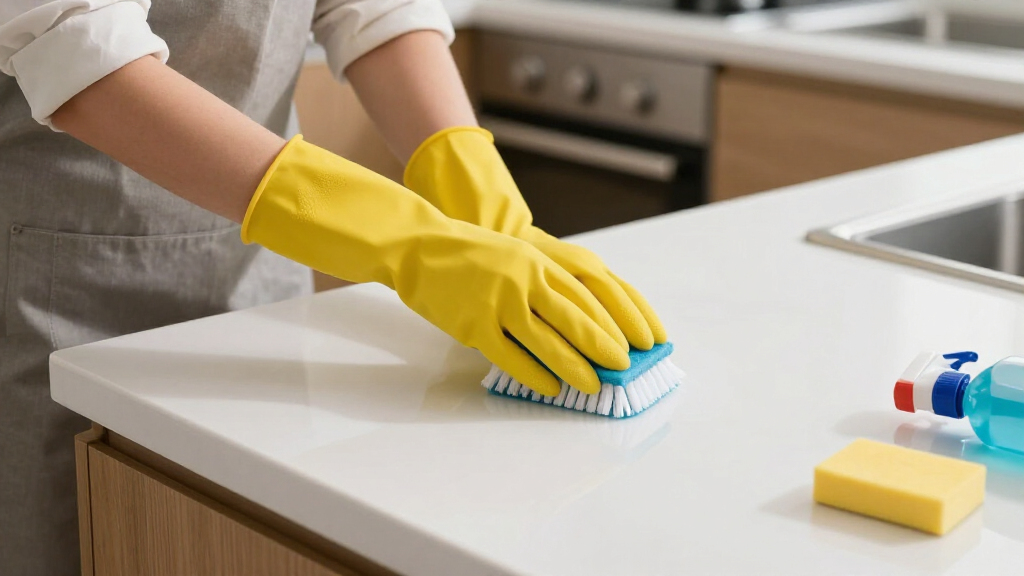
For example, if you notice a sticky film or residue around the nozzle, bacteria could be lurking. Washing these parts with hot water and dish soap daily takes 2 minutes, but it’s a game changer for safety. Keep a small brush handy to scrub seams and corners where residue hides.
Pro tip: Use a dedicated drying rack for these parts to air dry completely, reducing the risk of mold. Remember, never reach into the powder hopper with wet fingers—dry, clean hands only.
As an affiliate, we earn on qualifying purchases.
Your Simple Weekly Deep Clean Checklist for the Formula Maker
A weekly deep clean resets your machine. It’s like giving it a spa day—removing stubborn residue, mineral deposits, and dust that daily wipes miss.
This process is crucial because daily cleaning, while important, often misses the buildup of mineral deposits, especially around nozzles and internal crevices. Over time, these residues can harden, impairing the machine’s ability to dispense formula accurately and efficiently. If not addressed, mineral deposits can clog water lines, reduce water flow, and even cause mechanical failure. Regular deep cleaning prevents these issues, extends your machine’s lifespan, and ensures your baby receives properly mixed, safe formula.
Here’s a step-by-step checklist:
- Unplug the machine and let it cool.
- Empty the powder container—if the manual allows, store any leftover formula in a dry, airtight container.
- Remove all detachable parts labeled dishwasher-safe.
- Wash these parts in hot, soapy water or run them through the dishwasher.
- Clean around seams, inside corners, and nozzles with a soft brush.
- Wipe down the water reservoir and lid with a damp cloth.
- Thoroughly rinse all parts and let them air dry on a clean towel or drying rack.
- Reassemble carefully, making sure all parts are dry and fitted correctly.
- Run a rinse cycle or a quick setup to ensure proper function before next use.
Remember: Avoid harsh chemicals, bleach, or vinegar unless your manual says it’s safe. This routine isn’t just about cleanliness—it’s about maintaining the integrity of your machine’s components, preventing long-term damage, and ensuring your baby’s health isn’t compromised by overlooked residues or deposits.
infant formula machine descaling kit
As an affiliate, we earn on qualifying purchases.
As an affiliate, we earn on qualifying purchases.
When and Why You Need to Descale Your Formula Maker
Descaling is about removing mineral deposits from the water system—think of it as unclogging tiny pipes clogged with hard water crusts. If you notice reduced water flow, strange tastes, or your machine’s warning lights, it’s time to descale.
According to manufacturers, descaling every 1-3 months is typical for households with hard water. Use only approved descaling solutions, and follow the instructions carefully. Descaling keeps your machine efficient, prevents clogs, and ensures accurate dosing.
If mineral deposits are allowed to accumulate, they can cause inconsistent water flow, which affects the consistency and safety of the formula. For example, in areas with high mineral content, deposits can form rapidly, leading to clogging and longer heating times. Regular descaling prevents these issues, maintaining the machine’s performance and prolonging its lifespan. It’s a tradeoff—neglecting descaling might save time short-term but can lead to costly repairs or less safe feedings over time.
For example, in a city with high mineral content, you might need to descale monthly. In softer water areas, twice a year might suffice. Check your machine’s manual for specific guidance.
baby bottle sterilizer and cleaner
As an affiliate, we earn on qualifying purchases.
As an affiliate, we earn on qualifying purchases.
Common Mistakes That Compromise Your Baby’s Safety and How to Avoid Them
Many parents unknowingly make cleaning errors that compromise hygiene. For instance, treating weekly cleaning as sufficient for parts that need daily attention can lead to bacteria buildup. Overfilling or packing powder too tightly can cause incorrect dosing, which might harm your baby.
Other mistakes include reassembling parts while still damp, which encourages mold, or neglecting regular descaling, leading to mineral buildup. Using unapproved cleaning agents—like vinegar or bleach—can damage parts or leave harmful residues.
To avoid these pitfalls, follow the manufacturer’s instructions closely, keep a cleaning schedule, and always inspect parts for wear or damage. A quick check before each bottle ensures everything functions correctly.
Neglecting these steps can result in bacterial contamination, incorrect formula concentration, or mechanical failures that could jeopardize your baby’s health. For example, mold growth from damp reassembled parts can cause respiratory issues or infections. Similarly, mineral buildup can lead to inconsistent water temperature or flow, affecting formula safety. The tradeoff here is between convenience and potential health risks—skipping proper procedures may seem easier but can have serious consequences.
As an affiliate, we earn on qualifying purchases.
Safety First: What To Know About Preparing Bottles in a Formula Maker
Safety comes first, especially with babies under two months or with health issues. Automated formula makers don’t sterilize water or formula; they heat water, but not enough to kill bacteria. Always follow pediatric advice for vulnerable infants.
Make sure to check the machine’s behavior—clogs, leaks, or unusual dispensing signals problems. If a bottle looks too thin, thick, or has clumps, stop and troubleshoot. Remember, improper concentration can be harmful.
For high-risk babies, some parents switch to ready-to-feed liquid formulas, which are sterile until opened. Always verify that the machine is clean, parts are dry, and settings are correct before every use.
Understanding the limits of your machine is critical. It’s designed to assist, not replace, proper sterilization. The wrong preparation—like using contaminated water or improperly cleaned parts—can introduce bacteria, risking severe illness. For vulnerable infants, this risk is even higher, so extra precautions such as using sterile water or pre-sterilized bottles are advisable. The tradeoff is between convenience and safety—trusting the machine blindly can be dangerous if you overlook these critical details.
New Trends and What They Mean for Your Weekly Routine
Today’s formula makers are evolving. Many include cleaning reminders, dishwasher-safe parts, and digital maintenance alerts—aimed at making hygiene easier. Some even have replaceable funnels or built-in descaling prompts.
But no matter how tech-savvy your machine gets, manual cleaning remains essential. Manufacturers increasingly recommend combining features with regular, thorough cleaning routines.
For example, a newer model might remind you to descale every two months or alert you when a filter needs replacing—small steps to keep your machine in top shape. Remember, convenience features never replace good habits.
Staying aware of these trends can help you integrate new features into your routine effectively. For instance, setting reminders for descaling ensures you don’t forget, but it’s still vital to perform the actual cleaning manually. The tradeoff is that relying solely on alerts can lead to complacency, so maintaining a personal schedule is key to long-term hygiene and device longevity.
Frequently Asked Questions
How often should I clean the milk-contact parts of my formula maker?
Most manufacturers recommend cleaning these parts daily or after every few bottles. Regular cleaning prevents bacteria and mold from building up and ensures proper formula dispensing.Can I put parts in the dishwasher?
Only if the parts are explicitly labeled dishwasher-safe. Check your manual—hot water and detergent are usually fine, but avoid high heat or harsh detergents that can warp or damage components.How do I descale the machine safely?
Use only the manufacturer-approved descaling solutions and follow their instructions carefully. Avoid vinegar or unapproved chemicals, as they can damage your machine or leave residues harmful to your baby.Is sterilizing necessary for the machine or parts?
Typically, sterilizing the machine isn’t necessary unless specified. Focus on thorough cleaning of removable parts and follow pediatric guidance for preparing bottles, especially for vulnerable infants.What should I do if I see mold or smell an odor?
Stop using the machine immediately. Disassemble, clean all parts thoroughly with hot soapy water, and replace any damaged components. Contact the manufacturer if contamination persists.Conclusion
Keeping your formula maker safe doesn’t have to be complicated. A simple, consistent routine—daily wipe-downs, weekly deep cleans, and periodic descaling—creates a hygienic environment for your baby’s meals. Think of it as caring for a tiny, precious machine that feeds your little one’s future.
Remember: Safety is always a step beyond convenience. Build these habits into your week, and you’ll keep your baby healthy, happy, and well-fed—without the stress of last-minute scrubbing.
Fall Picks
fall essentials
As an affiliate, we earn on qualifying purchases.