
TL;DR

Turn the school run and nap time into listening time
- Thousands of audiobooks, podcasts and originals
- Listen on your phone, tablet or Echo — also offline
- Cancel anytime
Proper outlet placement in a nursery keeps cords safe, devices accessible, and the room organized. Planning ahead avoids hazards and future rewiring, making your nursery safer and more functional.
Imagine stumbling into your nursery at 3 a.m., fumbling for a softly glowing night-light while your baby stirs. That’s when you realize—poor outlet placement makes everything harder, more dangerous, and less tidy.
Planning where all your baby tech plugs in before furniture arrives saves you from tangled cords, accidental unplugging, and awkward reaches in the dark. It’s about creating a room that’s safe, adaptable, and designed for your routines, not just a collection of gadgets.
Install more outlets than you initially think you need to prevent clutter and hazards.
Place outlets so cords are out of reach, avoiding behind or under furniture and the crib.
Use tamper-resistant receptacles and GFCI outlets in wet areas for safety.
Plan for future devices by including USB-C ports and strong Wi-Fi coverage.
Avoid reliance on extension cords or daisy-chained power strips to reduce fire risks.
Nursery Outlet Planning: Where All the Baby Tech Plugs In
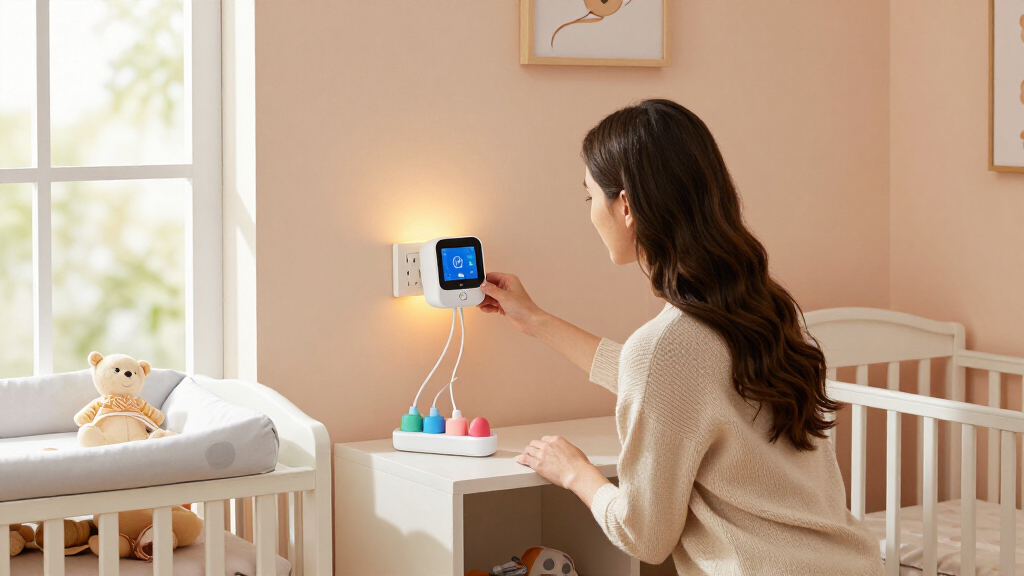
Stumbling in at 3 a.m. for a softly glowing night-light is when poor outlet placement becomes obvious — and dangerous. Map every plug before the furniture arrives and you avoid tangled cords, accidental unplugging, and awkward reaches in the dark.
per nursery
outlet height
child’s reach
“Installing more outlets than you initially think you need reduces reliance on extension cords and power strips — the most common sources of nursery hazards.”
Extra receptacles in every zone keep cords short, walkways clear, and future devices plug-ready without rewiring.
How to Map Outlets That Actually Work
Getting outlet placement right starts with a simple map: what devices you’ll need, where they’ll go, and how cords will run to keep everything safe and accessible.
Lay Out Furniture
Map the crib, changing table, feeding chair, dresser and storage before choosing any outlet spot.
Mark Device Zones
Note where each device sits or hangs — monitor facing the crib, warmers by the changing pad, lamp by the chair.
Route the Cords
Let cables hang naturally with cord clips — no sharp bends, pinched cords, or runs through crib slats.
Add a Charging Station
A dedicated shelf or drawer near the feeding chair keeps phone, pump and tablet cables off the floor.
Zone by Zone: What Plugs in Where
A modern nursery may need power for a monitor, sound machine, night-light, humidifier, air purifier, bottle warmer, smart speaker, pump and charger. Give every zone its own plan.
Crib & Monitor Area
Power the monitor where the camera gets a clear view but its cord cannot enter the crib or be reached by the child. Never route cords through crib slats or under mattresses — and never place outlets directly behind the crib.
Changing Station
Allow power for a lamp, wipe warmer or charger — but keep GFCI-protected receptacles out of the splash zone and never route cables across the changing surface. A slightly higher outlet beats a low one behind the pad.
Feeding Chair
An adult-accessible outlet serves the pump, phone charger, reading lamp or tablet. Position it so no cable crosses a walkway or loops around the chair — the classic 3 a.m. tripping hazard.
Dresser & Equipment Station
The best home for the sound machine, humidifier, air purifier and charging hub. Leave ventilation around appliances and protect wall and furniture from humidifier moisture.
The 5–6 Foot Sweet Spot
Monitors need a spot high enough to avoid curious hands but low enough for a good view. A plug about 5–6 feet above the crib keeps cords out of reach while staying accessible to parents.
Power Draw: Why the Wall Outlet Wins
Humidifiers, space heaters and bottle warmers draw more power than a standard outlet chain can safely share. Connect them directly to a dedicated, properly rated wall receptacle — never through a power strip or daisy-chained extension cord.
Dedicated Circuits for Heaters
A small space heater plugged into an overloaded extension cord is a fire risk. Follow the manufacturer’s instructions and keep heaters away from curtains, furniture and outlets.
Inspect Cords & Sockets
Regularly check outlets and cords for damage. Damaged sockets or frayed cables should be replaced immediately by a licensed electrician — safety first, always.
Do This, Not That
Furniture placement does not replace electrical protection. Compare the practices that keep a nursery safe against the shortcuts that create hazards.
| Practice | Safe Approach | Hazard to Avoid | Verdict |
|---|---|---|---|
| Outlet caps | Tamper-resistant receptacles with internal shutters | Small removable caps — a choking hazard | TR ✓ |
| Outlet position vs. crib | Beside large furniture, accessible | Directly behind the crib — pinched, reachable cords | Never behind ✗ |
| Wet zones | GFCI outlet mounted higher, away from splash | Low outlet behind the changing pad | GFCI ✓ |
| Extra devices | One spare outlet per zone, USB-C ready | Daisy-chained power strips | Plan ahead ✓ |
| Heaters & warmers | Dedicated rated wall receptacle | Extension cords and overloaded strips | Fire risk ✗ |
| Cord routing | Clips and hooks along the wall | Through crib slats or under mattresses | Strangulation risk ✗ |
| Smart devices | Circuit-compatible dimmers & smart outlets | Mismatched bulbs, overloads | Check compatibility ~ |
Make Nighttime Care a Breeze
Dimmers, smart switches and layered lighting turn the nursery into a calming haven — while strong Wi-Fi or wired Ethernet matters as much as the receptacle itself.
Bright Overhead
Full illumination for tidying and daytime routines, on a switch reachable from the doorway.
Soft Task Light
A dimmer near the feeding nook lowers the light just enough to see — without fully waking your baby.
Very Low Night-Light
Scheduled via smart outlets so you never fumble behind furniture in the dark at 3 a.m.
Five Rules to Plug Into
Install more outlets than you initially think you need to prevent clutter and hazards.
Place outlets so cords are out of reach — never behind or under furniture and the crib.
Use tamper-resistant receptacles and GFCI outlets in wet areas for safety.
Plan for future devices with USB-C ports and strong Wi-Fi coverage.
Avoid extension cords and daisy-chained power strips to reduce fire risks.
How to Map Out Outlets That Actually Work for Your Nursery
Getting your outlet placement right starts with a simple map. Think through what devices you’ll need, where they’ll go, and how cords will run to keep everything safe and accessible.
Begin by laying out your furniture—crib, changing table, feeding chair, dresser. Mark potential outlet spots based on where devices will sit or hang. For example, the monitor should face the crib but keep cords out of reach through clever routing.
Don’t forget to include a dedicated charging station for your phone, pump, or tablet near your feeding area. Position outlets so cables hang naturally, avoiding sharp bends or pinched cords that could fray over time.
tamper-resistant outlet covers for nursery
As an affiliate, we earn on qualifying purchases.
As an affiliate, we earn on qualifying purchases.
Why Every Nursery Needs More Outlets Than You Think
It’s tempting to stick with the minimum number of outlets, but that’s a mistake. A nursery can quickly become a tangle of extension cords and power strips—hazards waiting to happen.
Having at least one extra outlet in each key zone—crib, changing station, feeding area—means you can add devices later without rewiring. For instance, a smart monitor, humidifier, and night-light all need power, and you don’t want cords crossing walkways.
Think of it like planting a garden: the more healthy roots you have in the ground, the fewer weeds— or tangled cords—pop up later.
Beyond convenience, extra outlets provide flexibility as your child’s needs evolve. You might start with just a monitor and a lamp, but as they grow, you’ll likely add noise machines, tablets, or other gadgets. Planning for this ahead prevents costly rewiring or dangerous clutter down the line.
More outlets also mean less reliance on extension cords, which often cause overheating, tripping hazards, or accidental unplugging. This proactive approach reduces potential safety risks and simplifies future modifications.
As an affiliate, we earn on qualifying purchases.
Where to Place Outlets for Baby Monitors and Tech
Baby monitors need a clear, safe spot—high enough to avoid curious hands but low enough for a good view. A plug about 5-6 feet above the crib often works well, keeping cords out of reach but still within easy access for parents.
For instance, if your monitor has a flexible arm, mount it on the wall near the crib corner, with the outlet just above eye level. Use cord clips or adhesive hooks to keep excess cable tidy, away from little fingers.
Remember: never route cords through crib slats or under mattresses. A loose cable might seem harmless until your baby pulls on it, risking strangulation or accidental unplugging.
Choosing the right placement not only prevents accidents but also ensures your devices function optimally. Poorly placed outlets can cause cords to stretch or sag, which might lead to disconnections or damage over time. Proper positioning minimizes these risks, maintaining both safety and device longevity.
Deeply consider the placement of outlets for your baby monitors and tech—think about accessibility, safety, and the natural flow of cords. Well-placed outlets reduce strain on cables, prevent accidental pulls, and ensure your devices operate reliably, which is crucial for ongoing monitoring and peace of mind.
As an affiliate, we earn on qualifying purchases.
Designing a Safe and Easy-to-Use Changing Station Outlet Setup
Your changing station needs power for wipes warmers, night-lights, or a small lamp. Place a GFCI outlet within arm’s reach, but keep it away from the wet zone—think about a splash guard or installing it slightly higher.
Position outlets so cords run behind the dresser or wall, not across the surface. Use cord clips to secure cables, preventing tripping or pulling hazards. For example, a low outlet behind the changing pad might seem convenient, but it’s safer higher up or behind furniture.
Having a dedicated outlet at this spot reduces clutter and makes quick diaper changes smoother, even in the middle of the night. It also prevents the risk of accidental water exposure or short circuits, which are critical safety considerations in a wet environment.
Deeply consider the placement of outlets at your changing station—think about accessibility, safety, and minimizing clutter. Proper placement ensures you can quickly and safely power your devices without cords creating tripping hazards or water exposure risks, especially during nighttime changes.
As an affiliate, we earn on qualifying purchases.
Smart Lighting and Power Controls — Make Nighttime Care a Breeze
Smart switches, dimmers, and night-lights transform the nursery into a calming haven. Install dimmable fixtures near the feeding chair and in the main room, making late-night feedings or diaper changes gentle on your eyes.
Position switches so you can turn on a soft glow without fumbling in the dark, ideally from the doorway or your chair. For example, a dimmer switch near the feeding nook allows you to lower the light just enough to see, without fully waking your baby.
Smart outlets can schedule lights or sound machines, reducing the need to reach behind furniture. But always check that your devices are compatible with your circuits and that cords stay out of reach. This planning ensures safety and convenience, preventing accidental activation or electrical overloads that could pose hazards.
Deeply consider the placement of smart lighting controls—think about ease of access, safety, and the ability to operate devices without disturbing your baby. Proper placement enhances convenience and safety, ensuring you can control lighting and devices effortlessly during late-night care.
High-Demand Appliances and Power Safety: What You Need to Know
Humidifiers, space heaters, and bottle warmers draw a lot of power—more than a standard outlet often supplies. Connect these directly to a dedicated, properly rated wall outlet, not a power strip.
For example, a small space heater in the nursery can be a fire risk if plugged into an overloaded extension cord. Always follow the manufacturer’s instructions and keep such appliances away from curtains, furniture, and outlets.
Regularly inspect outlets and cords for signs of damage. Damaged sockets or frayed cables should be replaced immediately by a licensed electrician. Safety first, always. Properly rated outlets prevent overloads that could cause electrical fires or damage, and regular inspections catch issues early before they become hazards.
Understanding the power demands of high-energy devices and ensuring they are connected safely is crucial. Overloading circuits can lead to overheating and fires, especially in a nursery where safety is paramount. Using dedicated outlets and performing routine inspections minimizes these risks and keeps your nursery safe for your little one.
Network and Data: Why Your Nursery Needs a Strong Wi-Fi Plan
Many baby monitors now come with Wi-Fi or Ethernet options, making reliable internet coverage vital. A weak signal leads to dropped feeds and frustration.
Consider installing a dedicated access point or Ethernet cable for your monitor. For example, running a short Ethernet cable from your router to a nearby outlet ensures a steady connection, especially in larger or multi-story homes.
Strong network coverage also protects your data—many smart devices store sensitive information, so secure passwords and regular updates are essentials. A robust Wi-Fi setup minimizes disruptions, ensuring continuous monitoring and peace of mind, while also safeguarding your private information from potential cyber threats.
Deeply evaluate your home’s network infrastructure—think about signal strength, coverage, and security. A well-designed Wi-Fi plan prevents interruptions that could compromise your child’s safety and privacy, supporting reliable, secure monitoring over time.
Common Mistakes to Avoid When Planning Nursery Outlets
Many parents make simple but costly mistakes—like installing too few outlets, hiding sockets behind furniture, or using extension cords long-term. These oversights turn your nursery into a safety hazard or a cord jungle.
For example, a common slip-up is placing an outlet behind the changing table, where cords can be pulled or chewed. Instead, opt for outlets beside the furniture, with cords routed behind or along the wall.
Another mistake is relying on power strips for multiple devices. They overload circuits and cause fire risks—permanent wiring or dedicated circuits are safer choices. Avoiding these pitfalls by planning thoughtfully ensures your nursery remains a safe, functional space that won’t require frequent reconfigurations or pose hazards as your child grows.
Deep understanding of common wiring and placement errors helps you avoid hazards. Rushing or neglecting to plan thoroughly can lead to unsafe conditions, costly rewiring, or the need to redesign the space as your child’s needs change. Learning from these mistakes ensures a safer, more adaptable nursery environment.
Final Tips for a Future-Ready Nursery Power Plan
Think ahead. Choose standard outlets with plenty of capacity. Install USB-C or USB-A outlets, but keep the option to swap chargers as standards evolve.
Ensure your network is robust and your wiring is safe and accessible. Anchor heavy furniture to prevent tipping and route cords so they’re out of reach. Most importantly, always have a licensed electrician review your plan for compliance and safety.
Deeply consider future-proofing—plan for evolving technology needs, accessibility, and safety standards. Well-designed wiring today prevents costly upgrades tomorrow and creates a nursery that adapts seamlessly to your growing family’s needs, ensuring safety and convenience for years to come.
Frequently Asked Questions
How many outlets does a nursery really need?
Most nurseries benefit from at least 4-6 outlets in key zones—crib, changing, feeding—and extras for future devices. Local codes set minimum spacing, but adding a few more keeps cords tidy and devices accessible.
Where should I put the baby monitor outlet?
Place it about 5-6 feet above the crib, facing the sleeping area, with cords routed safely along the wall. Keep the plug out of reach of curious little hands, and never run cords through crib slats.
Are built-in USB outlets worth it?
They’re convenient but can limit flexibility as charging standards change. Pairing standard outlets with replaceable chargers often offers better future-proofing and cost savings.
Can I use extension cords long-term in the nursery?
No. Extension cords are meant for temporary use only. Permanent wiring should be done by a licensed electrician to meet safety standards, especially in a nursery.
What safety features should my outlets have?
Look for tamper-resistant shutters, GFCI protection near wet areas, and arc-fault protection if your circuit requires it. These features reduce risks and meet modern safety codes.
Conclusion
Careful outlet planning turns your nursery into a safe, flexible space that adapts with your child. It’s a small investment of time that pays off in peace of mind and fewer late-night surprises.
As you set up, picture a room where cords stay hidden, devices work smoothly, and safety is built into every outlet. That’s the nursery you want—ready for today, prepared for tomorrow.
Fall Picks
fall essentials
As an affiliate, we earn on qualifying purchases.