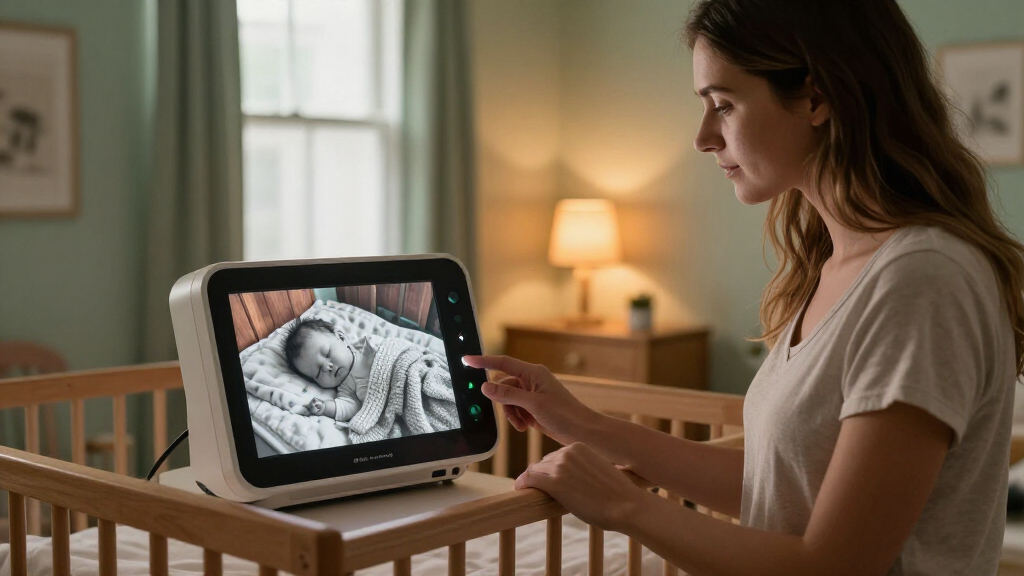

This guide walks you through choosing a safe location, connecting a baby monitor with night vision, adjusting its settings, and testing the video and alerts. It is for caregivers setting up a new monitor or repositioning one in a nursery. No technical experience is needed; allow about 30-45 minutes, including time to test the connection.

Turn the school run and nap time into listening time
- Thousands of audiobooks, podcasts and originals
- Listen on your phone, tablet or Echo — also offline
- Cancel anytime
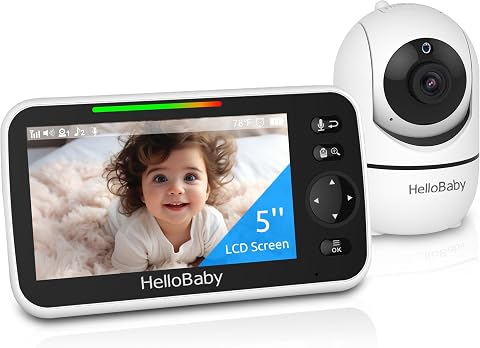
HelloBaby HB6550 Non-WiFi Baby Monitor with Camera and 5-Inch Screen
- ✔ Screen: 5-inch color screen
- ✔ Camera movement: 355° pan, 120° tilt
- ✔ Zoom: 2× digital

GoodBaby 5-Inch Baby Monitor with Camera and Audio
- ✔ Display: 5-inch LCD
- ✔ Video resolution: 480p
- ✔ Camera movement: 355° pan, 120° tilt

HelloBaby 4.3-Inch Video Baby Monitor with Remote Pan-Tilt-Zoom
- ✔ Screen: 4.3-inch IPS
- ✔ Camera movement: 350° pan, 120° tilt
- ✔ Night vision: Automatic infrared
Difficulty: Beginner | Time: 30-45 minutes
What You’ll Need
Tools & Materials:
- Baby monitor camera and parent unit, or camera and compatible phone app
- Power adapters supplied or approved by the monitor manufacturer
- Stable shelf or manufacturer-approved wall mount
- Screwdriver and mounting hardware if the manual requires them
- Wi-Fi network details for a connected monitor
Knowledge:
- Basic ability to use a phone app or parent unit
- Ability to follow the monitor’s setup and mounting instructions
Read the product manual before placing or mounting the camera. Follow the manufacturer’s age, distance, power, and mounting instructions. Keep the camera, cords, and mount out of the baby’s reach. A video monitor supports caregiver checks; it does not replace safe-sleep practices or direct supervision.
HelloBaby HB6550 Non-WiFi Baby Monitor with Camera and 5-Inch Screen
The HB6550 takes the top spot because it combines the core nighttime features with the broadest stated room coverage. Its 5-inch color screen is the same size as the GoodBaby display, and its camera remotely pans 355°, tilts 120°, and offers 2× digital zoom. Those controls make it easier to reframe a sleeping area from the parent unit instead of relying on a fixed view. Infrared night vision supports dark-room checks, while two-way audio and a sound-level LED indicator add useful ways to respond without turning on the screen or entering the room.Its clearest advantage over the other two is expandability to four cameras. That makes the HB6550 a more adaptable pick for families who want to monitor a nursery and another room over time. The GoodBaby also offers flexible mounting and a clearly described 480p image, but it does not list multi-camera support. The smaller HelloBaby 4.3-Inch is more compact and gives a specific ECO/non-ECO battery breakdown; the HB6550 instead lists up to 30 hours without stating the mode behind that figure.We also value its no-Wi-Fi FHSS connection for households that want monitoring through a dedicated parent unit rather than an app. Still, the provided specifications do not state video resolution, and battery runtime can vary with how the screen is used. Choose it for a well-rounded, expandable night-monitoring setup; skip it if you need confirmed image resolution or an explicitly documented continuous-screen runtime.
Pros:
- Infrared night vision with remote pan, tilt, and 2× zoom
- No-Wi-Fi 2.4 GHz FHSS connection
- Supports up to four cameras
- Includes two-way audio, temperature alerts, lullabies, and sound-level LED indicator
Cons:
- Video resolution is not stated in the supplied specifications
- The up-to-30-hour battery claim does not identify the operating mode
- Not water resistant
Best for: Families who want a 5-inch night-view screen now and the option to add cameras for additional rooms.
Not ideal for: Buyers who need a stated video resolution, outdoor or water-resistant equipment, or battery claims broken down by screen-use mode.
Bottom line: We rank the HB6550 first for its balance of a 5-inch display, remote night-view framing, and the lineup’s clearest multi-room expansion path.
“We rank the HB6550 first for its balance of a 5-inch display, remote night-view framing, and the lineup’s clearest multi-room expansion path.”
GoodBaby 5-Inch Baby Monitor with Camera and Audio
GoodBaby is the strongest fit for parents who want a larger parent display and more control over where the camera can sit. The 5-inch screen matches the HB6550, and remote 355° pan, 120° tilt, and 2× zoom provide a similar way to adjust the nighttime view from a distance. Its distinguishing practical detail is mounting flexibility: the camera can be placed on a desk or mounted on a wall, ceiling, or crib. That range can help when the best angle is not available from a standard tabletop position.Unlike either HelloBaby listing, this model specifies 480p video resolution, giving buyers a concrete image detail to weigh rather than an unanswered spec. It also states up to 1,000 feet of range and includes temperature alerts, feeding alarms, two-way audio, and eight lullabies. Those extras make it more feature-heavy than the compact HelloBaby 4.3-Inch, though they do not establish that its night image is sharper than the HB6550, whose resolution is unlisted.Battery expectations need care: GoodBaby claims up to 30 hours in VOX mode but only up to 10 hours with the screen on. That is a meaningful difference for parents who keep the display continuously active, and the HB6550’s less-detailed runtime claim cannot be directly compared. We recommend GoodBaby when mounting options and a stated resolution matter; those seeking longer continuous viewing should look closely at the battery limitation before choosing it.
Pros:
- 5-inch display with remote pan, tilt, and 2× zoom
- Infrared night vision and a stated 480p resolution
- Mounting options include wall, ceiling, crib, desk, and freestanding placement
- Includes temperature alerts, feeding alarms, two-way audio, and lullabies
Cons:
- Battery life is listed as up to 10 hours with the screen on
- 480p resolution may not satisfy buyers seeking a more detailed image
- The 30-hour maximum applies to VOX mode, not continuous viewing
Best for: Parents who need flexible camera mounting, remote nursery framing, and a stated video-resolution specification.
Not ideal for: Families who expect to leave the parent screen on through long stretches without recharging or want resolution above the stated 480p.
Bottom line: GoodBaby is our placement-focused pick, especially when mounting versatility and a clearly stated 480p image matter more than continuous-screen battery life.
“GoodBaby is our placement-focused pick, especially when mounting versatility and a clearly stated 480p image matter more than continuous-screen battery life.”
HelloBaby 4.3-Inch Video Baby Monitor with Remote Pan-Tilt-Zoom
The 4.3-inch HelloBaby is the compact alternative in this group. Its IPS screen is smaller than the 5-inch panels on the HB6550 and GoodBaby, which may suit a bedside table or a parent unit that is carried around the home. Remote camera movement still covers 350° of pan and 120° of tilt, and automatic infrared night vision helps keep the view usable in darkness. Two-way audio and sound-activated screen wake round out a straightforward no-Wi-Fi setup.Its battery information is more specific than the HB6550’s: up to 30 hours in ECO mode and up to 16 hours in non-ECO mode. That gives buyers a clearer sense of how operating mode affects overnight use, though it still does not promise the same runtime in every viewing pattern. The GoodBaby, by comparison, states a 10-hour maximum with its screen on; the 4.3-Inch lists 16 hours in non-ECO mode, but the modes are not defined identically, so we should not treat those figures as a direct test comparison.This model is best viewed as a simpler, smaller-screen pick rather than the most expandable option. Its listing specifies two channels but does not state support for additional cameras, unlike the HB6550’s four-camera capacity. Range is approximately 1,000 feet and may vary, and no video resolution is provided. Choose it for the more compact IPS screen and explicit ECO battery breakdown; look elsewhere if a 5-inch display, multi-camera capability, or confirmed resolution is essential.
Pros:
- 4.3-inch IPS screen in a more compact parent unit
- Infrared night vision with remote pan and tilt
- Battery life is specified for both ECO and non-ECO modes
- No Wi-Fi or app required; includes two-way audio and sound-activated screen wake
Cons:
- Smaller screen than the two 5-inch alternatives
- Video resolution and multi-camera expansion are not stated
- Range is approximate and may vary
Best for: Parents who prefer a smaller IPS parent screen and want battery estimates separated by ECO and non-ECO operation.
Not ideal for: Buyers who prioritize a 5-inch display, clearly stated video resolution, or documented expansion to multiple cameras.
Bottom line: Choose this HelloBaby when compactness and clearly separated ECO-mode battery claims matter more than a larger display or stated multi-camera support.
“Choose this HelloBaby when compactness and clearly separated ECO-mode battery claims matter more than a larger display or stated multi-camera support.”
As an Amazon Associate we earn from qualifying purchases.
Before You Start
Choose a location where the camera can view the sleep space without being attached to the crib, bassinet, or play yard. Route and secure every cord so it cannot reach the baby; follow the manufacturer’s specified minimum distance from the sleep area, and keep cords at least 3 feet (0.9 metres) from the crib when applicable. Do not place cords under rugs or leave them hanging. If the monitor uses Wi-Fi, check that the nursery has a reliable signal and that your phone can install the required app. Never rely on a camera view alone to determine whether a baby is breathing or safe.
Step-by-Step Instructions
Step 1: Choose a safe camera position
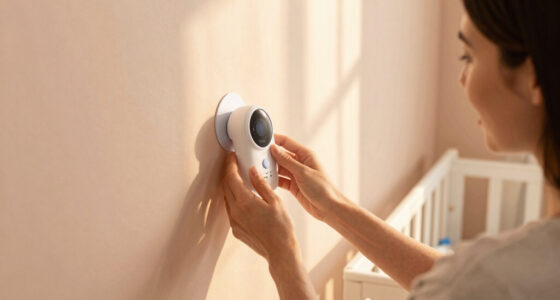
Place the camera on a stable shelf or mount it on a wall according to the manual. Aim it toward the baby’s sleep surface so the view includes the area where the baby rests. Keep the camera and all cords well out of reach, and do not attach the camera to the crib or place it inside the sleep space. Check the view from the parent unit or app before tightening a wall mount or routing cables permanently.
Tip: Avoid aiming the lens directly at a window, mirror, shiny surface, or bright lamp; reflections can make night vision look washed out.
Check: The sleep surface is visible, the camera is stable, and the baby cannot reach the camera, mount, or cords.
Step 2: Connect power and assemble the monitor
Plug the camera into the power source specified in its manual, then charge or power the parent unit if your model includes one. Use the supplied adapter or a manufacturer-approved replacement. Keep power cords secured along the wall and away from the sleep area. Turn on the camera and parent unit, and check that each device’s power indicator appears as described in the manual.
Tip: Do not use a damaged adapter, frayed cable, or loose outlet. Stop setup and replace the faulty component through the manufacturer if you see damage or smell burning.
Check: The camera stays on without flickering or restarting, and the parent unit or app can detect it.
Step 3: Pair the camera with the parent unit or app
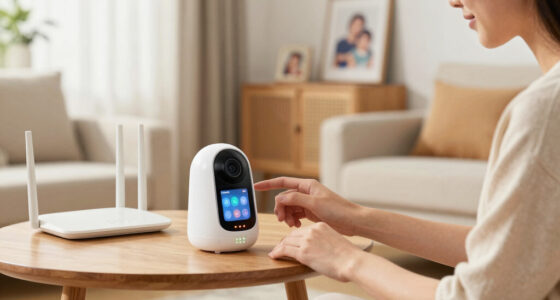
Follow the model-specific pairing instructions. For a parent unit, select the camera-add or pairing option and activate pairing on the camera when prompted. For an app-based monitor, install the official app, create or sign in to your account, and connect the camera to the intended Wi-Fi network. Enter the network password carefully; many monitors only support a specific Wi-Fi band, which the manual will identify. Avoid sharing account access with people who do not need it.
Tip: Do not reset the camera unless the manual calls for it. A reset may remove existing settings or require pairing from the beginning.
Check: The parent unit or app displays a live image from the correct camera, rather than a pairing screen or an offline message.
Step 4: Set the camera view and night vision
With the room lights on, adjust the camera angle so the sleep surface remains in frame. Open the video settings and choose automatic night vision if available; otherwise, select the night-vision mode described in the manual. Turn off the room lights and wait several seconds for the image to change. Check whether the camera switches to a monochrome infrared image. If your model offers brightness, infrared, or image settings, make small changes and check the picture after each one.
Tip: Infrared night vision usually shows a black-and-white image and may make eyes or reflective objects appear bright. That effect alone does not indicate a problem.
Check: In darkness, you can distinguish the sleep area and see the baby’s general position. The image is not obscured by glare, reflections, or a nearby object.
Step 5: Configure sound, motion, and viewing alerts
Set the volume and alert types in the parent unit or app. Start with sound alerts, then enable motion or temperature alerts only if your monitor supports them and you want those notifications. Follow the manual to set sensitivity: a setting that is too sensitive can produce repeated alerts, while one that is too low may not report small sounds or movements. Check that notification permissions are enabled on your phone if you use an app, and confirm that the parent unit is not muted.
Tip: Do not treat consumer monitor alerts or sensor readings as a medical assessment. Follow your caregiver or clinician’s advice for health concerns.
Check: Sound is audible at the usual listening position, and the monitor shows the selected alert settings.
Step 6: Test the picture, sound, and connection
Keep the baby in a safe, supervised setting while you test. From the normal viewing location, confirm that the image is clear in both lit and dark conditions. Ask another adult to speak softly near the camera or use the monitor’s approved test method, then check that sound reaches the parent unit or phone. If the monitor has a range or connection indicator, walk to the places where you expect to use it and watch for signal loss. Test alerts using the manufacturer’s method rather than making assumptions about what triggers them.
Tip: Do not leave the baby unattended to test range, alerts, or app notifications. Keep a caregiver nearby and able to respond directly.
Check: Video and audio remain available from your usual viewing location, and any intended alerts arrive as the manual describes.
Step 7: Secure the final setup and review access
After testing, tighten the approved mount or settle the camera firmly on its shelf. Secure cords along the wall and recheck that none can be pulled into the sleep area. For a connected camera, use a unique account password, enable two-factor authentication if offered, and install firmware updates through the official app or manufacturer instructions. Keep the parent unit or phone charged and place it where the responsible caregiver can hear or see alerts.
Tip: Recheck the camera position and cord routing whenever furniture moves, the camera is adjusted, or the baby becomes more mobile.
Check: The camera cannot fall or be reached from the sleep space, cords are secured, and only authorized caregivers can access the video.
Common Mistakes to Avoid
- Mounting the camera on the crib or leaving a cord within reach. — Use a stable shelf or the manufacturer-approved wall mount, then secure cords away from the sleep area and follow the manual’s distance requirements.
- Assuming night vision is broken because the image is black and white. — Turn off the lights and wait for the infrared mode to activate; many monitors show a monochrome image in darkness.
- Placing the camera where infrared light reflects off glass or a shiny surface. — Move the camera or change its angle so the lens does not face a window, mirror, or reflective object.
- Relying on phone notifications without checking the app’s permissions or connection. — Enable notifications, test the alert using the manufacturer’s method, and keep a charged parent unit or another dependable way to monitor.
Troubleshooting
Problem: The camera appears offline or will not pair.
Solution: Check that the camera has power, the parent unit or phone is on the correct network, and the network band matches the monitor’s requirements. Move the camera closer to the router for setup, then retry the manual’s pairing process. Restart devices only as directed; use a reset only if the manufacturer recommends it.
Problem: The night image is too dark, blurry, or washed out.
Solution: Clear dust from the lens with a soft, dry cloth. Re-aim the camera, remove reflective objects from its line of sight, and check the manufacturer’s night-vision or image settings. Make sure the camera is not blocked by furniture or fabric.
Problem: The video works, but sound or alerts do not.
Solution: Raise the parent-unit volume, check mute and alert settings, and confirm that phone notifications are allowed. Test again using the manual’s method. If sound remains unavailable, check for a software update or contact the manufacturer.
Problem: The connection drops from another room.
Solution: Check the signal indicator and move the monitor or router to a more open location if possible. Reduce obstructions, confirm the router is working, and check the monitor’s stated range. Do not assume a stated maximum range will apply through walls or floors.
What Success Looks Like
The camera is firmly positioned outside the baby’s reach, all cords are secured according to the product instructions, and the sleep surface appears in the correct camera feed. The monitor provides a usable image in daylight and darkness, sound reaches the intended caregiver, and configured alerts pass a test. For app-based models, the account is protected and the connection is stable where the caregiver will use it. The setup supplements, rather than replaces, safe sleep and direct caregiver attention.
Next Steps
Check the camera view, mounting, cords, sound, and connection whenever you change the room layout or move the monitor. Keep the app and device software updated through official channels, and review who has account access. If the camera, power supply, or mount is damaged, stop using it and contact the manufacturer. Follow current safe-sleep guidance and your child’s care team’s advice; seek help from the manufacturer for model-specific setup or recurring faults.
Frequently Asked Questions
Should I use automatic or manual night vision?
Use automatic mode if your monitor supports it and changes reliably between light and dark. Choose manual mode only if the instructions recommend it or you need to control the setting yourself. Test the image with the room lights off before relying on it.
Where should I put a baby monitor camera?
Put it on a stable shelf or secure it with the manufacturer-approved wall mount, aimed at the sleep surface and outside the baby’s reach. Keep cords secured and observe the product manual’s distance requirements.
Why does night vision make my baby’s eyes look bright?
Infrared light can reflect from eyes and other surfaces, making them appear bright on the monitor. Check the camera angle and the product manual. If the camera becomes unusually hot, damaged, or behaves abnormally, stop using it and contact the manufacturer.
Can I rely on a baby monitor to tell me whether my baby is safe?
No. A monitor can provide video, sound, and alerts, but it cannot replace safe-sleep practices, a caregiver’s judgment, or direct checks. Follow current safe-sleep advice and seek medical guidance for health concerns.
What should I do if my Wi-Fi baby monitor loses connection?
Check camera power, router service, signal strength, and compatibility with the required Wi-Fi band. Move the camera closer during setup and follow the manual’s reconnection steps. Keep a dependable alternative for monitoring while the connection is unavailable.
Fall Picks
fall essentials
As an affiliate, we earn on qualifying purchases.