TL;DR
Listen free for 30 days with Audible
Thousands of audiobooks and originals — cancel anytime.
Start your free trialAs an affiliate, we earn on qualifying purchases.
This guide shows how renters can set up a nursery without drilling. It covers damage-free mounting ideas, safety tips, and practical solutions for every nursery zone. Expect concrete examples and actionable advice.
Setting up a nursery in a rental feels like walking a tightrope. You want it safe, organized, and cozy — but don’t want to leave holes or damage behind. The good news? There are plenty of damage-free ways to hang, organize, and decorate.
From removable decals to tension rods, you can create a nursery that’s both functional and renter-friendly. This guide walks through the best no-drill ideas, safety tips, and real-world examples to help you craft a space that works for your family — and your landlord.
Always prioritize safety over convenience, and seek landlord permission for safety anchors.
Choose mounting solutions based on item weight and wall surface, avoiding improvised fixes for heavy or breakable objects.
Proper wall prep and testing are key to successful damage-free mounting.
Regularly reassess the nursery as your child grows to remove hazards and ensure safety.
Stay informed about new, renter-friendly nursery products and trends for a safer, easier setup.
Renter-Friendly Nursery Setup: No-Drill Mounting Ideas
A safe, cozy nursery without holes in the wall. This guide covers damage-free mounting methods, weight and surface limits, safety essentials, and practical solutions for every nursery zone — so the room works for your family and your deposit.
Safety Comes Before Deposit Protection
Heavy objects like mirrors or shelves above the crib pose fall risks. Adhesive-only restraints are not equivalent to wall-anchored anti-tip hardware — small, properly repaired holes are always preferable to an unsecured dresser.
Never Above the Crib
- No glass-framed art, mirrors, or shelves mounted with adhesive strips over the crib or changing area
- Keep the crib away from windows, blind cords, curtains, and artwork
- A lightweight mobile on a removable hook is fine — keep it out of reach
Anchor Heavy Furniture
- Dressers and bookcases can tip when children climb or pull drawers open
- Ask your landlord for written permission to install anti-tip anchors
- Drawer locks help, but do not eliminate tip-over risk
Respect the Ratings
- Follow every product’s weight, surface, temperature, and curing-time instructions
- Use a substantial safety margin below the advertised maximum
- No improvised suction or adhesive mounts for heavy, breakable, or powered items
Match the Mounting Method to the Item
The right no-drill solution depends on weight, fragility, and wall surface. When in doubt, choose freestanding furniture or seek written permission for wall anchors.
| Item Type | Best No-Drill Mount | Notes | Crib-Zone Safe? |
|---|---|---|---|
| Lightweight art & photos | Removable adhesive strips | Walls must be smooth and fully cured; test in a small area first. Non-glass frames only. | ✗ Never above crib |
| Clothing & accessories | Removable hooks | Smooth, clean surfaces only; textured walls reduce adhesion. | ✓ Yes |
| Mobile or light curtain rod | Tension rods | Place on sturdy, flat surfaces; check periodically for slippage. | ~ Out of reach only |
| Diaper storage & toys | Over-the-door organizers | Verify doors close fully; keep out of the child’s reach. | ✓ Yes |
| Paper prints & posters | Poster putty / removable tabs | Cheapest, lightest-duty option; remove carefully to avoid paint peel. | ✗ Never above crib |
| Heavy or fragile items | Freestanding furniture | Or obtain written landlord permission for proper wall anchors. | ✓ Yes |
Surface Condition Determines Performance
Adhesives cling best to clean, smooth, fully cured surfaces. Dust, grease, textured paint, or fresh coatings dramatically reduce hold — a decal applied to a dusty, rough wall may peel off within a month.
Clean Right
Wipe the area with isopropyl alcohol — not household cleaners, which leave residues — and let it dry completely before mounting.
Test First
Apply the adhesive in a small, inconspicuous spot to confirm it holds — and that it removes cleanly later without peeling paint.
Have a Plan B
On textured or uneven walls, skip adhesives entirely: use freestanding racks or over-the-door organizers that don’t rely on the wall at all.
Plan for the Mobile-Child Stage
A nursery setup isn’t static. What’s safe for a newborn becomes a pulling target once your baby can move. Reassess the room at every developmental stage.
Rolling Soon
Keep the crib clear of cords, décor, and loose fabric. Mobiles may hang high — for now.
Everything Is a Target
Remove reachable cords, hooks, bags, and hanging organizers. Tuck monitor and power cables several feet away.
Pull Zone Expands
Move furniture away from windows and climbable routes. Avoid décor with small magnets, ribbons, or button batteries.
Full Reassessment
Lock drawers — but never assume locks stop tip-overs. Re-anchor or remove anything that can be climbed or toppled.
Practical No-Drill Ideas for Every Nursery Zone
Each zone needs a tailored balance of safety, function, and damage prevention. Here are concrete solutions for the four key areas.
Light & Lean
- Lightweight acrylic or frameless holders for paper art
- Removable decals for a mural effect — check paint compatibility
- Lean large panels only if stable and inaccessible to the child
- Keep galleries away from sleeping and changing areas
Cordless by Default
- Tension rods for lightweight curtains on sturdy frames
- Choose cordless window coverings whenever possible
- Adhesive cord cleats alone may be insufficient — go cordless
Low & Stable
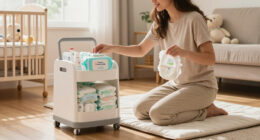
- Low, wide bins and rolling carts with lockable wheels
- Over-the-door organizers kept out of reach
- Ensure units can’t tip; place daily items on stable surfaces
Lighting & Monitors: use freestanding lamps, plug-in night-lights, and place monitors on sturdy furniture or approved stands. Never attach monitors directly to the crib or walls with adhesive — powered items always require proper, manufacturer-approved mounting.
The Damage-Free Mounting Workflow
Weigh & Classify
Determine the item’s weight, fragility, and position. Anything heavy, breakable, or above the crib needs anchors — with landlord approval.
Check the Surface
Smooth, clean, fully cured? Textured, chalky, or wallpapered walls mean choosing freestanding alternatives instead.
Prep & Test
Clean with isopropyl alcohol, dry fully, and test the adhesive in a hidden spot before committing.
Mount & Recheck
Stay well below rated weight limits, then inspect periodically — and reassess at every developmental stage.
Five Rules for a Safe, Deposit-Friendly Nursery
Always prioritize safety over convenience, and seek landlord permission for safety anchors.
Choose mounting solutions based on item weight and wall surface — never improvise for heavy or breakable objects.
Proper wall prep and testing are the keys to successful damage-free mounting.
Regularly reassess the nursery as your child grows to remove hazards before they appear.
Stay informed about new renter-friendly nursery products and trends for a safer, easier setup.
Small, properly repaired holes are always better than an unsecured piece of furniture or a fallen object.
Safety First: What You Need to Know Before Mounting Anything
Safety always comes before protecting your deposit. Heavy objects like mirrors or shelves above the crib pose fall risks that could seriously harm your baby. Even damage-free mounting methods have their limits—adhesives and hooks can fail if overloaded or used improperly. Always ask your landlord for permission before installing any hardware, even damage-free options, because some rental agreements explicitly prohibit modifications.
Following product instructions carefully, respecting weight limits, and understanding wall surface requirements are crucial. Properly installed safety anchors can prevent furniture from tipping, but the decision to use them should be made in consultation with your landlord. Remember, neglecting safety can lead to accidents, which are far worse than a few holes or marks on the wall.
For example, hanging a lightweight mobile from a removable hook is generally safe, but a dresser that might tip over needs a proper anti-tip restraint—this should be approved by your landlord to prevent liability issues and damage.
As an affiliate, we earn on qualifying purchases.
Match the Mounting Method to Your Items: No-Drill Hacks for Every Surface
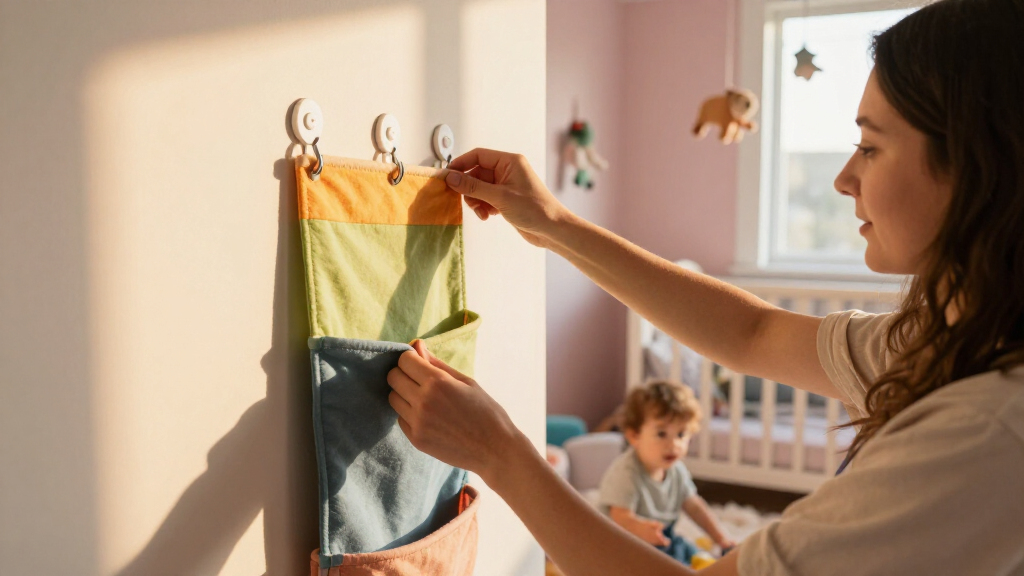
Selecting the appropriate no-drill solution depends on what you’re hanging and its weight, fragility, and the wall surface. Lightweight décor, like decals or small pictures, often work well with removable adhesive strips that can be easily repositioned or removed without residue. For clothing or small accessories, hooks or over-the-door organizers are practical because they don’t require wall damage and can be moved as needed.
However, the choice isn’t just about convenience—it’s about understanding the tradeoffs. For instance, adhesive strips may lose their grip over time, especially on textured or uneven walls, leading to potential falls. Over time, hooks might loosen or detach if not properly secured, risking damage or injury. Tension rods are excellent for lightweight curtains but can slip if not placed on sturdy surfaces or if subjected to frequent tugging. Over-the-door organizers are versatile but can sometimes interfere with door operation or cause scratches if not used carefully.
Here’s a quick comparison table to help you decide:
| Item Type | Best No-Drill Mount | Notes |
|---|---|---|
| Lightweight art or photos | Removable adhesive strips | Ensure walls are smooth and fully cured; test in a small area first |
| Clothing or accessories | Removable hooks | Use on smooth, clean surfaces; avoid textured walls which reduce adhesion |
| Mobile or lightweight curtain rod | Tension rods | Ensure they are placed on sturdy, flat surfaces and check periodically for slippage |
| Diaper storage or toys | Over-the-door organizers | Verify doors can close fully without obstruction |
For heavier or fragile items, consider freestanding furniture or obtain written permission for wall anchors. Always match the mounting method to the item’s weight and fragility to prevent accidents and damage.
no-drill baby room storage solutions
As an affiliate, we earn on qualifying purchases.
As an affiliate, we earn on qualifying purchases.
Surface Condition Matters: How to Prep Walls for Better Hold
Adhesives cling best to clean, smooth, and fully cured surfaces. Think of walls as a fresh canvas—dust, grease, textured paint, or uneven surfaces can significantly reduce adhesion, increasing the risk of items falling and causing damage or injury. Proper surface preparation is essential to maximize the effectiveness of damage-free mounting solutions.
Before mounting, thoroughly clean the area with isopropyl alcohol—avoiding household cleaners that leave residues—and let it dry completely. Testing a small, inconspicuous area with the adhesive can reveal how well it will hold and whether it can be removed cleanly later. If your walls are textured or uneven, adhesives may not provide sufficient grip, leading to potential failures. In such cases, alternative solutions like freestanding racks or over-the-door organizers should be considered, as they do not rely on wall surface conditions.
For example, a peel-and-stick decal applied on a dusty or rough wall might peel off after a month, risking damage or creating a mess. Proper prep, including cleaning and testing, greatly increases the likelihood of a successful, damage-free removal, saving you stress and potential costs later.
As an affiliate, we earn on qualifying purchases.
Plan for Child Development: Moving From Newborn to Climber
A nursery setup isn’t static. As your baby grows, what was once safe can become a hazard. For example, a mobile hanging high above the crib might be out of reach for a newborn but becomes a pulling target once your baby can sit, crawl, or stand. Regular reassessment of the nursery is crucial to ensure ongoing safety.
Remove or secure cords, secure furniture away from windows, and move décor that could be pulled or knocked over. For instance, keep monitor cords and power cables tucked away to prevent tripping or strangulation hazards, and avoid long ribbons or small detachable parts that could pose choking risks. As your child develops, their curiosity increases, so proactively adjusting the environment minimizes hazards and supports safe exploration.
Think of safety as an ongoing process—what’s appropriate today might not be tomorrow. Regularly inspecting the nursery, removing hazards, and rethinking safety measures ensures your child’s environment grows with them, reducing the risk of accidents and fostering confidence in their exploration.
tension rod for nursery organization
As an affiliate, we earn on qualifying purchases.
As an affiliate, we earn on qualifying purchases.
Practical No-Drill Ideas for Every Nursery Zone
Each nursery zone requires tailored solutions to balance safety, functionality, and damage prevention. Here are concrete ideas for different areas:
- Walls & Decor: Use lightweight acrylic frames, removable decals, or lean artwork against the wall rather than mounting heavy objects. Keep heavy or fragile items like glass-backed pictures off the wall or secured with landlord approval to avoid hazards and damage.
- Windows: Install tension rods for lightweight curtains, opt for cordless blinds, and keep cords out of reach to prevent strangulation. Relying solely on adhesive cord cleats may be insufficient; consider using cordless window coverings for safety and damage prevention.
- Storage: Use low, wide bins, over-the-door organizers, or rolling carts with lockable wheels. Place frequently used items on stable surfaces like a dresser or changing table. Ensure storage units are sturdy and cannot tip over easily, reducing the risk of injury.
- Lighting & Monitors: Use freestanding lamps, plug-in night-lights, and place monitors on sturdy furniture or approved stands. Never attach monitors directly to the crib or walls, as this can pose safety risks and potential damage when removed.
Careful planning for each zone ensures safety, minimizes wall damage, and keeps the nursery functional as your child grows and develops new skills.
Latest Trends and New Developments in Renter-Friendly Nursery Setup
Innovations in nursery design are making damage-free setups more stylish and practical. Reusable fabric murals and repositionable textile stickers allow for decorative flexibility without wall damage. Manufacturers now offer modular systems that are easy to remove and reposition, giving renters more options without risking wall integrity.
Cordless shades and concealed-cord window coverings have become standard safety features, reducing strangulation risks while maintaining a sleek look. Minimalist nurseries leverage flexible floor storage options and convertible furniture that adapts as your child grows, all without making permanent changes to walls or floors.
Additionally, materials marketed as low-VOC and eco-friendly are gaining popularity. These products often feature less invasive adhesives and removable mounting options, making it easier to create a safe, sustainable nursery environment. Always look for credible certifications and carefully follow installation instructions to avoid damaging delicate surfaces.
These developments reflect a growing awareness of safety, sustainability, and convenience, helping parents build beautiful, functional nurseries that respect rental agreements and the environment.
Frequently Asked Questions
Can adhesive strips safely hold nursery shelves?
Most adhesive strips are rated for lightweight items and may not withstand outward pulls or weight changes. For safety, use freestanding storage or get landlord approval for wall anchors. Avoid relying solely on adhesive for shelves that need to bear weight or could fall.
Is it safe to hang pictures above the crib?
Best practice is to leave that space empty or decorate with decals or lightweight art placed out of reach. Heavy or glass-backed pictures pose a risk of falling, which can be dangerous for a sleeping baby.
How can I secure a dresser without drilling?
There’s no perfect no-drill substitute for a proper anti-tip restraint. Check with the furniture manufacturer and your landlord for approved options. Never assume adhesive restraints provide full protection, especially for tall or heavy furniture.
Are peel-and-stick wallpapers really removable?
Many are, but success depends on wall paint age and surface. Test a small section first, follow removal instructions carefully, and avoid textured or delicate walls to prevent damage.
Can a tension rod be used for nursery curtains?
Yes, for lightweight curtains on sturdy surfaces, but check regularly to prevent slipping. Keep the rod beyond the reach of curious little hands and avoid placing the crib directly underneath.
Conclusion
Creating a safe, organized nursery in a rental home is entirely possible with thoughtful planning and the right tools. Damage-free mounting isn’t just about avoiding holes—it’s about balancing safety, practicality, and respect for your space.
Imagine a cozy corner where your baby can grow and explore, all without leaving a trace. With these tips, that’s exactly what you’ll build, one damage-free step at a time.
Fall Picks
fall essentials
As an affiliate, we earn on qualifying purchases.