
TL;DR

Turn the school run and nap time into listening time
- Thousands of audiobooks, podcasts and originals
- Listen on your phone, tablet or Echo — also offline
- Cancel anytime
In small kitchens, every inch counts. Strategic decluttering, vertical storage, and multi-purpose tools can turn cramped counters into a well-organized feeding hub, boosting efficiency and reducing stress.
Ever tried feeding a toddler with only a tiny countertop to work with? It can feel like juggling in a phone booth. But with smart tricks, you can turn even the cramped space of a small kitchen into an organized, efficient feeding zone. This guide walks you through practical ways to make every inch count—so meal prep doesn’t turn into chaos.
Whether you’re dealing with less than 36 inches of usable counter or just want to keep things tidy during busy mornings, these tips help you prioritize what matters. Think of it as triaging your space—cutting out clutter, stacking smart, and using vertical real estate to create a smooth, stress-free feeding routine.
Declutter regularly to free up 20-30% of your counter space.
Use vertical storage like shelves and hooks to increase capacity by up to 50%.
Choose multi-purpose, foldable tools to save space and reduce clutter.
Arrange kitchen items based on workflow to minimize movement and save time.
Incorporate smart accessories like over-the-sink boards and magnetic strips to maximize every inch.
Counter Space Triage
Small Kitchen, Big Feeding Setup
When a toddler needs breakfast and the counter feels smaller than a cutting board, every inch needs a job. Clear the surface, build upward, choose tools that earn their footprint, and arrange the kitchen around the sequence of feeding.
01 / First-response plan
Triage the surface before buying storage
Treat the counter as active workspace, not permanent storage. Keep only the items that support the next feeding task; relocate, mount, nest, or remove everything else.
Declutter on a schedule
Move rarely used appliances, duplicate utensils, unopened mail, and decorative objects away from the preparation surface.
Use the walls
Install shelves, under-cabinet hooks, magnetic strips, and wall racks for frequently reached tools and ingredients.
Demand multiple functions
Choose compact tools that blend, chop, heat, or toast instead of dedicating a separate footprint to each function.
Shrink after use
Collapsible bowls, nesting cookware, fold-flat racks, and stackable containers return space the moment the task is complete.
Arrange by movement
Place ingredients, utensils, dishes, and feeding supplies in the order they enter the routine to reduce backtracking.
Borrow temporary surface
An over-the-sink board, slide-out tray, or fold-away counter creates workspace only when the feeding routine needs it.
If an object is not used most days or during the current task, it should not live on the counter.
02 / Capacity multiplier
Build upward and hide the overflow
Vertical systems turn blank wall and cabinet space into accessible storage. Hidden systems absorb less-frequent items while protecting the counter for preparation, serving, and cleanup.
Relative space impact
The percentages describe different outcomes: decluttering reclaims counter area, while vertical storage expands overall storage capacity.
Eye-level shelf
Reserve it for spices, jars, and lightweight items used throughout the week.
Under-cabinet rail
Hang utensils, measuring tools, or a compact colander without blocking preparation space.
Magnetic strip
Keep compatible tools visible and reachable while freeing drawer and counter capacity.
Pull-out cabinet zone
Use bins or drawers to contain backup feeding supplies and less-frequent appliances.
03 / Footprint audit
Make every tool earn its place
The best small-kitchen tool is not merely compact. It replaces another object, stores flat or nested, cleans quickly, and supports the feeding routine you actually follow.
| Tool or accessory | Counter impact | Storage behavior | Primary gain | Best use |
|---|---|---|---|---|
| Multi-function blender | Replaces 2+ devices | Compact appliance zone | Fewer footprints and cords | Daily purees and prep |
| Over-the-sink board | Adds temporary surface | Vertical or flat storage | Prep without using counter | Vegetables and snacks |
| Collapsible dish rack | Returns space after use | Folds nearly flat | Flexible cleanup zone | Small washing cycles |
| Nesting bowl set | One storage footprint | Stacks inside itself | Less cabinet overflow | Mixing and serving |
| Fold-down surface | Adds on-demand workspace | Closes against the wall | Prep or feeding flexibility | Peak morning demand |
| Magnetic containers | Moves items off counter | Uses a vertical plane | Fast visual access | Spices and small supplies |
Before adding a tool, ask four questions: What does it replace? Where does it store? Can it collapse or nest? Will it be used often enough to justify its footprint?
04 / Feeding workflow
Let the routine determine the layout
A well-zoned kitchen reduces unnecessary movement. The aim is a short, intuitive chain from gathering ingredients to clearing the last dish.
Gather
Pull ingredients and feeding gear from adjacent storage before opening the active workspace.
Prepare
Keep the board, knife, mixing tool, and waste container within a single reach.
Serve
Position plates, cups, bibs, and utensils near the child-feeding zone for a clean handoff.
Reset
Clear, wipe, collapse, and return tools immediately so the surface is ready for the next task.
05 / Zone map
Three zones, one smooth handoff
Even a narrow counter can support multiple functions when each section has a clear role and nothing crosses zones without purpose.
Keep it clear
Reserve the largest uninterrupted surface for cutting, mixing, portioning, and cooling food safely.
Contain the essentials
Use one drawer, bin, or compact corner for bottles, cups, bibs, spoons, and ready-to-grab snacks.
Prevent pileups
Place the drying rack, cleaning cloth, and waste point near the sink so cleanup never overtakes prep.
Remove one rarely used item today.
Claim one wall or cabinet surface.
Create a contained feeding-gear zone.
Store tools in task sequence.
Add one temporary prep surface.
Reassess the setup every month.
Why Decluttering Is Your First Move to Free Up Counter Space
The simplest way to free up precious space is to cut the clutter. Remove items you rarely use—like that vintage blender collecting dust or the extra set of utensils you never reach for. But beyond just tidying up, decluttering is about making intentional choices—what stays and what goes—so you can focus on what truly supports your feeding routine. This process reduces visual and physical chaos, which can lead to quicker meal prep, less stress, and a safer environment for your child. The tradeoff, however, is that you might need to reassess your storage habits and give up some seldom-used items, which can initially feel like a loss but ultimately streamlines your space and routine.
Imagine a typical morning: you’re trying to prepare breakfast while your toddler demands attention. A clear countertop, with just the necessary tools, makes everything smoother. Decluttering can free up 20-30% of your counter space, turning chaos into calm. This extra space can be the difference between a rushed, stressful meal and a calm, organized feeding session.
Pro tip: use drawer organizers to keep utensils and tools tucked away. Wall-mounted racks or magnetic strips for knives and spice jars also save surface space and keep everything within arm’s reach, making your workflow more efficient and less cluttered.
small kitchen vertical storage shelves
As an affiliate, we earn on qualifying purchases.
As an affiliate, we earn on qualifying purchases.
How Multi-Functional and Compact Tools Save Big Space
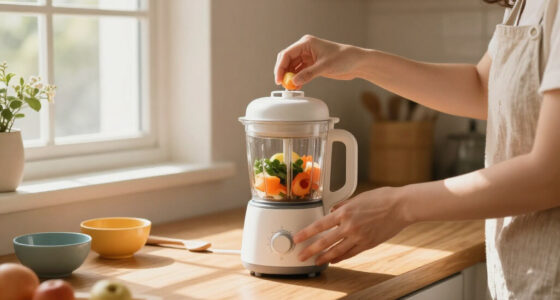
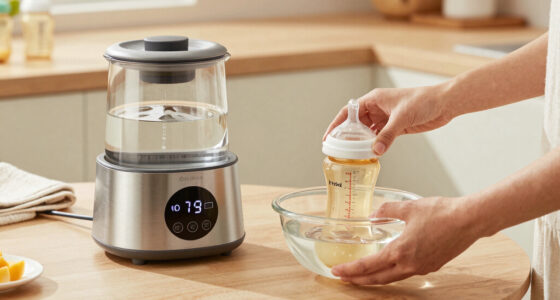
When every square inch counts, choosing tools that serve multiple purposes isn’t just convenient—it’s essential. Multi-functional tools reduce the need for separate appliances, which can be bulky and take up valuable counter space. For example, a blender that also functions as a food processor consolidates two appliances into one, freeing up counter real estate and simplifying cleanup. Collapsible bowls and foldable dish racks are designed to shrink when not in use, preventing clutter from piling up. The tradeoff with multi-purpose tools is that they might have a higher upfront cost or a learning curve, but the long-term space savings and efficiency gains outweigh these initial inconveniences.
Picture this: you use a 4-in-1 device that blends, chops, heats, and even toasts. It replaces four separate appliances—saving counter space, reducing electrical usage, and streamlining your workflow. This approach is particularly valuable in small kitchens where every inch and watt counts. Multi-purpose tools are a parent’s best friend in small kitchens because they help you maximize functionality without sacrificing precious space.
Keep in mind: look for compact, stackable cookware and utensils that nest neatly when stored. These tiny upgrades prevent your counters from becoming dumping grounds and make it easier to keep your space tidy and accessible.
multi-purpose foldable kitchen tools
As an affiliate, we earn on qualifying purchases.
As an affiliate, we earn on qualifying purchases.
Designing a Workflow That Keeps Things Moving
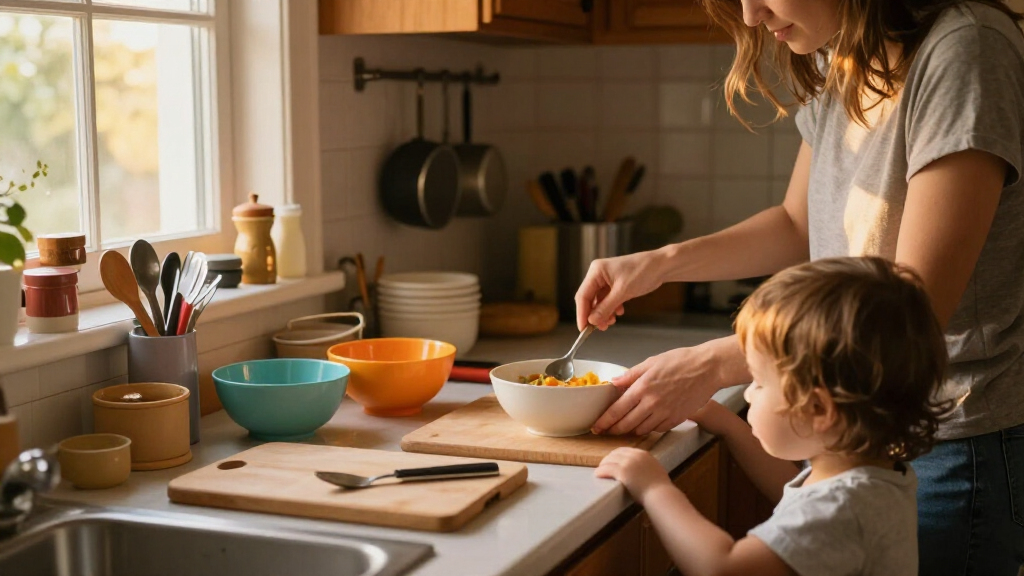
In a tiny kitchen, organizing your space around the natural flow of your cooking and feeding routines is crucial. This means placing items in logical positions—ingredients near your prep area, utensils close to the cutting board, and dishes ready for serving—so that each step in your routine flows smoothly. When you understand your typical sequence, you can reduce unnecessary movement, which saves time and energy—especially when juggling a child’s needs. For example, keeping the cutting board, knives, and vegetables within arm’s reach minimizes back-and-forth motions that can slow you down. Storing plates and silverware in a nearby pull-out drawer ensures quick access without cluttering your counter. The benefit of this setup is that it creates an intuitive workspace, reducing stress and making meal prep feel less like a puzzle. The tradeoff is that it requires some planning and willingness to reorganize as your routines evolve.
Pro tip: dedicate a small corner for your child’s feeding gear—bottles, bibs, and snacks—so you’re not hunting for everything during busy mornings. This dedicated zone helps streamline your routine, making it easier to focus on feeding and less on searching for supplies.
over-the-sink cutting board with storage
As an affiliate, we earn on qualifying purchases.
As an affiliate, we earn on qualifying purchases.
Using Vertical and Hidden Storage to Add Space Instantly
Vertical storage solutions are game-changers in small kitchens because they make use of often-overlooked wall space. Installing shelves above your counters for spices, jars, or small appliances transforms empty wall space into valuable storage. Using under-cabinet hooks for pots, pans, and utensils keeps bulky items off the counters and within easy reach, which is especially helpful during busy feeding times. The benefit of vertical storage is that it keeps your workspace clear while providing quick access to essential items, but it requires intentional placement and sometimes additional installation effort. Hidden storage options, like pull-out drawers or stackable bins inside cabinets, help you organize less-frequently-used items without cluttering your main workspace. These solutions maximize the available space and keep your counters free for daily use. The tradeoff is that some of these storage options may require upfront time and effort to install and organize but pay off with a more streamlined, accessible kitchen environment.
Imagine a narrow wall with a few sturdy hooks holding your spatulas, ladles, and even a small colander. It clears the counter and keeps essentials within reach. Adding a magnetic strip for knives saves drawer space and keeps blades safely accessible. For hidden storage, consider installing pull-out drawers in cabinets or using stackable bins—these keep things tidy and accessible, without eating into your limited counter space.
As an affiliate, we earn on qualifying purchases.
Surface-Saving Accessories That Make a Difference
Smart accessories can significantly expand your available workspace. Over-the-sink cutting boards let you prep vegetables without occupying counter space. Collapsible dish racks fold flat when not in use, freeing up space for other tasks. Slide-out trays can be tucked behind cabinet doors, hiding clutter and providing extra prep or storage surfaces when needed. The benefit of these accessories is that they are often inexpensive and easy to incorporate into your daily routine, but they require a bit of planning to ensure they fit your specific kitchen setup. For example, a fold-away prep surface can be a lifesaver during busy mornings, giving you extra space when needed and disappearing when not. Magnetic spice jars or wall-mounted soap dispensers keep counters clear, allowing you to focus on feeding your family instead of cleaning up clutter. The tradeoff is that these accessories can sometimes be limiting in size or capacity, so selecting the right ones for your needs is key.
Share specific accessories that save space and how to integrate them into your daily routine.
Latest Trends Making Small Kitchens Smarter and More Efficient
Recent innovations focus on maximizing every inch of small kitchens through space-saving and multi-use tech. Modular wall-mounted systems and magnetic strips for utensils utilize vertical space efficiently, reducing clutter. Foldable tables and extendable counters transform a small area into a versatile zone for meal prep and feeding, adapting to your needs. Smart, integrated appliances—like compact microwave-convection combos—combine functions to save space while maintaining performance. These appliances often have a smaller footprint and can be tucked away when not in use, freeing up counter space. The benefit of these trends is that they make small kitchens more adaptable and less cluttered, which is vital when managing busy mornings with children. However, they may require an initial investment and some reconfiguration of your current setup. According to BabyUI, embracing these innovations results in a more relaxed feeding environment and a more efficient routine, especially during the chaos of mornings.
Quick Stats: Why Space-Saving Matters More Than Ever
| Fact | Details |
|---|---|
| Average counter space in small kitchens | Less than 36 inches, often less than 24 inches in tiny apartments |
| Impact of clutter | Reduces prep efficiency by up to 25% and increases stress during busy mornings |
| Vertical space potential | Can increase storage capacity by up to 50% in small kitchens |
| Cost-effective upgrades | DIY solutions like hooks, shelves, and organizers can improve space without major renovation costs |
Reducing clutter and maximizing vertical space isn’t just about tidiness—it’s about creating a calm, efficient feeding environment in your small kitchen.
Your Top 5 Quick Fixes for More Counter Space Today
- Remove everything that doesn’t get daily use. Store or toss it.
- Install hooks or magnetic strips for knives, utensils, or spices.
- Opt for collapsible or stackable tools and containers.
- Use over-the-sink cutting boards and fold-away racks.
- Rearrange your workflow—place frequently used items closest to your prep zone.
These small changes can free up 10-15% of your counter space immediately. Perfect for busy mornings or last-minute cleanup.
Think Bigger: Turn Tiny Space Into a Feeding Powerhouse
With a little creativity, your small kitchen can become a feeding hub that works for your family’s busy life. Use every inch—vertical, hidden, and underused—to keep things flowing smoothly. Regularly revisit your setup, and don’t be afraid to try new solutions.
Imagine a space where your toddler’s bottles, snacks, and utensils are organized on a wall-mounted rack. Your prep area is clear, and you have room to prepare meals without feeling cramped. That’s not just possible—it’s within reach.
Remember: a small, well-organized kitchen is not a limitation—it’s an opportunity to simplify, streamline, and create a more joyful feeding routine.
Frequently Asked Questions
How can I maximize counter space in a tiny kitchen?
Focus on decluttering, use vertical storage solutions like shelves and hooks, and incorporate foldable or multi-purpose tools to keep your counters clear and functional.What are the best appliances for small kitchens?
Opt for compact, multi-functional appliances such as toaster ovens that combine baking and toasting, microwave-convection combos, and fold-away dish racks that fold flat when not in use.How do I organize my small kitchen efficiently?
Group similar items together, use drawer dividers, install hooks and shelves for vertical storage, and keep only daily essentials on the counter while storing rarely used items elsewhere.Are there space-saving furniture options?
Yes, fold-down tables, extendable counters, and wall-mounted foldable desks can serve as prep or dining areas without taking up permanent space.What are some DIY tips for creating more counter space?
Use adhesive hooks to hang utensils, install under-cabinet lighting with hooks, and repurpose vertical space with shelves or magnetic strips—simple, cost-effective ways to reclaim space.Conclusion
In small kitchens, every inch matters. A few smart choices—like decluttering, vertical storage, and multi-purpose tools—can turn a cramped space into your best ally during busy feeding routines. Think of it as giving your tiny kitchen a fresh start, where efficiency and calm replace chaos.
So, take a moment to reassess your counters today. With small tweaks, you’ll create a feeding setup that’s not just functional but a little bit joyful—because a well-organized space makes all the difference, especially at 3am.
Halloween Picks
halloween
As an affiliate, we earn on qualifying purchases.