
TL;DR

Turn the school run and nap time into listening time
- Thousands of audiobooks, podcasts and originals
- Listen on your phone, tablet or Echo — also offline
- Cancel anytime
Buzzing and rattling in sound machines usually come from loose components or vibrations. Tightening screws, adding damping materials, and proper placement are quick, effective fixes to restore peace and prevent sleep disruptions.
If your sound machine is suddenly buzzing or rattling, it can feel like a small nightmare—especially if your little one’s trying to nap or sleep. Those annoying noises often seem to pop up out of nowhere, disrupting what should be a soothing environment. Fortunately, most of these issues are fixable with a few simple steps. Understanding what causes the buzz and rattle is the first move toward quiet comfort.
In this guide, you’ll learn quick, practical fixes to silence those bothersome sounds. Whether it’s tightening a screw, adding some padding, or repositioning the device, these tips can save you time and frustration. No need to toss your sound machine—most problems are easier to solve than they appear.
Start by inspecting for loose screws and internal parts—most rattles are simple to fix.
Use damping materials like foam or rubber pads to absorb vibrations and silence buzz.
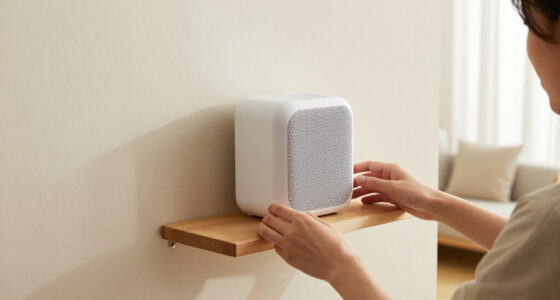
Place your sound machine on a soft, stable surface away from walls or hard furniture.
Regular maintenance, including tightening screws and cleaning, can prevent many noise issues.
If noise persists despite fixes, consider professional repair or replacement to ensure peace and quiet.
What causes buzz and rattle in your sound machine—and how to spot the culprit
Buzzing and rattling often come from loose or vibrating parts inside the device. When internal components like screws, the speaker, or wiring aren’t securely fastened, they can generate unwanted noise that travels through the device and the surface it rests on. External factors, such as placing the machine on uneven or hard surfaces, can amplify these vibrations, turning a gentle hum into a disruptive rattle. Recognizing the source is crucial because it determines the most effective fix. For example, a loose screw might be quick to tighten, but a misaligned internal part may require repositioning or replacement.
Understanding the cause helps avoid unnecessary repairs or replacements. If the noise is due to internal looseness, fixing it can restore the device’s original quietness without costly parts. Conversely, ignoring these signs can lead to further damage, making the noise worse or causing the device to fail prematurely. So, it’s not just about stopping the noise — it’s about maintaining your device’s longevity and ensuring a peaceful sleep environment.
sound machine vibration dampening pads
As an affiliate, we earn on qualifying purchases.
As an affiliate, we earn on qualifying purchases.
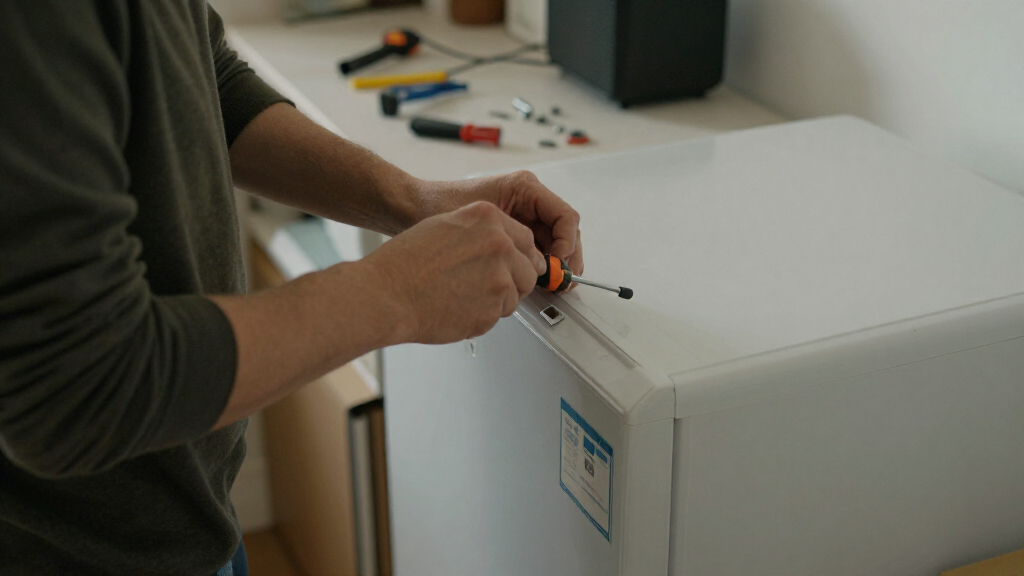
How to tighten screws and secure internal parts without breaking your sound machine
- Unplug the device and find a clean, flat workspace to prevent accidental damage or loss of small parts.
- Use a precision screwdriver to gently tighten all visible screws—pay special attention to those around the speaker and casing edges, as these often loosen over time with regular use.
- Inspect internal components—look for loose wiring, disconnected connectors, or shifting mounting brackets that might cause rattling or buzzing.
- If you find a loose speaker or motor, carefully tighten its mounting screw or reattach the bracket. This step is critical because even a slight shift can cause persistent noise.
- Replace any missing or worn screws with hardware that matches the original specifications to prevent further damage or misalignment.
- Close the casing securely, ensuring no parts are pinched or misaligned. Proper assembly preserves the device’s integrity and prevents future issues.
Many parents find that just tightening a few screws stops the rattling almost instantly. However, overtightening can crack plastic or strip threads, which might require more extensive repairs or replacements. So, the key is to tighten just enough for a snug fit without applying excessive force. This balance ensures the device remains intact and quiet, prolonging its lifespan and maintaining a peaceful environment.
As an affiliate, we earn on qualifying purchases.
Simple DIY fixes to dampen vibrations and silence the noise
Applying damping materials isn’t just about quieting your device—it’s about reducing the wear and tear caused by vibrations that can loosen internal parts over time. Using damping materials effectively prolongs your sound machine’s life and maintains its performance. For instance, vibrations can cause internal wires to chafe or components to shift, leading to persistent noise or eventual failure. Absorbing these vibrations minimizes stress on the internal parts and prevents further damage.
Here are some effective options:
- Cut small pieces of soft foam or felt and place them around internal components or under the device. These materials absorb vibrations before they travel through the casing or surface.
- Stick rubber pads or anti-vibration feet on the bottom of the sound machine. This creates a buffer between the device and hard surfaces, significantly reducing surface vibrations and noise transmission.
- Use double-sided tape or adhesive putty to secure loose wires or internal parts that rattle. This prevents internal movement that causes noise and keeps everything in place.
For example, a parent once placed felt strips behind the speaker in her baby’s sound machine. The buzzing stopped, and her baby slept soundly through the night. These fixes are inexpensive, reversible, and can be tailored to different devices, making them ideal for quick, temporary relief or even long-term maintenance. The tradeoff is that some damping materials might slightly alter the sound quality, but generally, the benefit of a quieter environment outweighs minor sound changes.
sound machine screw tightening tool
As an affiliate, we earn on qualifying purchases.
As an affiliate, we earn on qualifying purchases.
When placement matters: choosing the best spot to keep noise down
The placement of your sound machine can significantly influence its noise level and effectiveness. Positioning it on a soft, stable surface like a padded mat or plush carpet helps absorb vibrations that might otherwise travel through furniture and amplify noise. Conversely, placing it on hard, echo-prone surfaces like glass or unpadded wooden furniture can turn a quiet device into a noisy source, especially as internal parts vibrate during operation.
For example, setting your sound machine on a plush rug or a padded shelf reduces the transmission of vibrations, resulting in a calmer environment. Avoid placing it directly on glass nightstands or thin wooden surfaces that easily resonate or amplify sound. Elevating the device slightly on a small stand or stack of books can further minimize vibration transfer. This small adjustment can make a noticeable difference in noise levels, creating a more peaceful sleep environment.
In one case, a parent moved the machine from a hardwood dresser to a soft, fabric-lined drawer. The rattling disappeared, and the soothing sounds became crystal clear. The key is to experiment with placement until you find the spot that minimizes noise without compromising accessibility or safety. Proper placement not only reduces noise but also extends the life of your device by preventing unnecessary vibrations and stress.
sound machine noise reduction accessories
As an affiliate, we earn on qualifying purchases.
As an affiliate, we earn on qualifying purchases.
Frequently Asked Questions
My sound machine is buzzing. Is it safe to open and try to fix it myself?
If you’re comfortable with small electronics, you can carefully open the device to tighten screws or check for loose wires. However, avoid opening it if it’s still under warranty or if you’re unsure—professional repair might be safer.What’s the best material to dampen vibrations inside my sound machine?
Soft foam, felt strips, or rubber pads work well. They absorb vibrations effectively and are easy to cut and place inside the device or underneath it.How often should I check my sound machine for noise issues?
Every few months, especially if your device is older or used frequently. Regular inspections and cleaning can prevent many common problems.Can I just replace the noisy part myself?
Only if you’re familiar with electronics and comfortable opening devices. Otherwise, consult the manufacturer or a professional technician to avoid damaging your sound machine.When should I replace my sound machine altogether?
If repairs become too costly or the device is old and consistently noisy despite troubleshooting, replacing it might be the best choice for peace and quiet.Conclusion
Quietness comes down to understanding the source of those annoying noises. A few minutes of inspection and some simple adjustments can turn a rattling, buzzing device back into a peaceful sleep aid. Think of it as giving your sound machine a little tune-up—quiet and calm are just a fix away.
Remember, a peaceful sleep environment starts with a quiet device. Keep these tips in mind, and you’ll be surprised how much calmer bedtime can become—night after night.
Evergreen bestsellers Picks
bestsellers
As an affiliate, we earn on qualifying purchases.