
TL;DR
Listen free for 30 days with Audible
Thousands of audiobooks and originals — cancel anytime.
Start your free trialAs an affiliate, we earn on qualifying purchases.
A diaper pail’s set-in smell usually comes from odor compounds trapped in seams, seals, and scratched plastic. The key is removing residue, disinfecting properly, and drying thoroughly for a lasting fix.
If your diaper pail smells worse after cleaning, you’ve hit the common reality of diaper duty. That stubborn odor isn’t just lingering in the air — it’s hiding inside tiny scratches, seals, and microscopic crevices. The good news? You can banish those smells for good by tackling the real sources, not just masking them with perfume or sprays.
In this guide, you’ll learn how to identify where the odor hides, the step-by-step process for deep cleaning, and simple tips for keeping your pail fresh long-term. Because when you get rid of the residue and dry every corner thoroughly, that smell stays gone — for good.
Odor sources include residue in seams, gaskets, scratches, and filters — not just the waste in the bag.
Always clean the entire pail with warm water and dish soap before disinfecting or deodorizing.
Dry every component thoroughly to prevent bacterial growth and odor recurrence.
Replace filters, gaskets, and damaged parts regularly to keep odors at bay.
Prevention habits, like frequent emptying and wiping, significantly reduce deep cleaning needs.
Diaper Pail Deep Clean: Removing Set-In Smell for Good
Persistent odor is rarely just “bad air.” It is usually residue and odor compounds held inside seams, seals, filters, hinges, and scratched plastic. Remove the film, treat the source, and dry every component completely for a lasting reset.
Find where the smell is hiding
If odor returns immediately after cleaning, inspect the small components first. Filters, gaskets, crevices, and damaged plastic can keep releasing odor even when the main bucket looks clean.
Beneath the liner
Leaks and condensation leave an organic film between the bag, inner bucket, and base.
Lid and hinges
Residue collects around moving joints, the pedal mechanism, bag cutter, and lid channels.
Gaskets and seals
Worn or contaminated rubber can hold odor and stop the lid from sealing effectively.
Filters and inserts
Activated carbon and deodorizing inserts eventually saturate and must be replaced.
Refill compartment
Hidden bag rings and cartridge spaces can trap dust, moisture, and waste residue.
Scratched plastic
Aging, porous, cracked, or deeply scratched surfaces can absorb odor compounds permanently.
The seven-step odor reset
Organic residue can shield microbes and reduce a disinfectant’s effectiveness. Physical cleaning must come first.
Follow the pail manufacturer’s instructions. Metal mechanisms, special seals, and electronic parts may need wiping rather than soaking.
Match the product to the problem
Each treatment has a specific role. Deodorizing is not the same as cleaning, and cleaning is not always the same as disinfecting.
| Solution | Primary role | Embedded residue | Microbial control | Best use |
|---|---|---|---|---|
| Dish soap | Removes grease and organic film | ✓ | — | Always begin here |
| Enzyme cleaner | Breaks down protein-based waste | ✓ | — | Stubborn organic odor |
| Diluted white vinegar | Helps dissolve mineral deposits | ~ | — | Compatible mineral buildup |
| Baking soda | Absorbs some airborne odor | — | — | Dry, ongoing odor support |
| Activated carbon | Adsorbs odor molecules | — | — | Replace when saturated |
| Approved disinfectant | Reduces microbes after cleaning | — | ✓ | Label-directed sanitation |
Key: ✓ suited to the task ~ limited role — not its primary function. Fragrance sprays may mask odor, but they do not remove contamination.
Relative role in a lasting reset
Choose by symptom
Never mix cleaning chemicals
Dangerous combinations can release toxic gases. Wear gloves, provide ventilation, keep products away from children, and follow every dilution and contact-time instruction on the label.
Drying completes the clean
Moisture beneath the liner, around a hinge, or inside a seal encourages new microbial growth. Air-dry the pail open in moving air; brief indirect sunlight may help, but prolonged strong sunlight can weaken some plastics.
The freshness chain
Break any link and odor can return. Keep the sequence intact after every deep clean.
When replacement wins
Repeated cleaning cannot restore a component that is saturated, damaged, inaccessible, or unable to seal.
Find the real source of the smell — it’s not just the trash bag
The first step in banishing diaper pail odors is pinpointing where they truly come from. Often, it’s not just the waste in the bag but hidden buildup around seals, hinges, and scratches. For example, a common culprit is residue lurking beneath the liner or inside the gasket, where moisture and waste settle into tiny cracks and pores.
Imagine opening your pail and smelling a faint, stale odor that doesn’t quite go away. That usually means odor compounds have soaked into the plastic or are trapped in seams, scratched surfaces, or worn rubber seals. Smell that returns immediately after cleaning? The filter or gasket might be saturated or damaged, and the odor is hiding in places you can’t see or reach.
Understanding where to look makes all the difference. Focus on:
- Residue beneath the liner or inside the bucket
- Build-up around hinges, lid, and pedal mechanism
- Clogged or saturated filters and deodorizing inserts
- Worn gaskets and seals that no longer keep odors out
- Scratched or aged plastic absorbing smells
Recognizing these hidden reservoirs of odor matters because they serve as ongoing sources of smell even after superficial cleaning. If you ignore these areas, you risk a cycle where odors quickly reappear, leading to frustration and repeated cleaning. Addressing these deeper issues means you’re effectively sealing off the microscopic escape routes that microbes and odor molecules use, ensuring a longer-lasting fresh scent.
As an affiliate, we earn on qualifying purchases.
Clean the right way — before deodorizing or disinfecting
Cleaning first is the secret to lasting odor removal. Organic waste and residue shield microbes and prevent disinfectants from working. Think of it like cleaning a greasy pan — you need to scrub away the grease before sterilizing.
Follow this simple sequence:
- Remove the waste, liner, filters, and any detachable parts.
- Take everything outside or into a well-ventilated space.
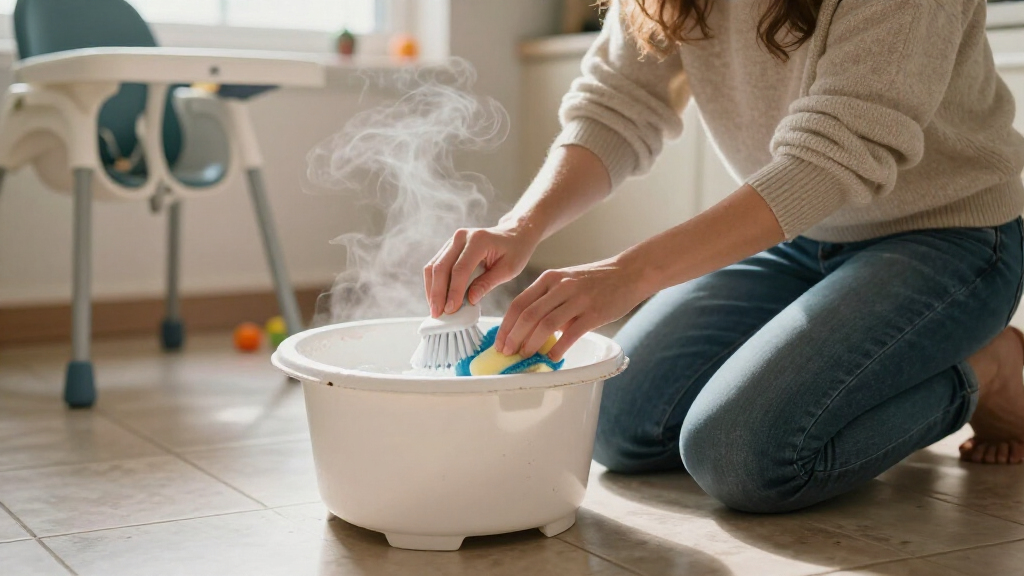
- Wash all removable parts and interior surfaces with warm water and dish soap.
- Scrub seams, hinges, and crevices with a soft brush or old toothbrush.
- Rinse thoroughly to remove all soap and loosened debris.
- Apply a disinfectant or odor treatment if needed.
- Let every component dry completely before reassembling.
Why is this important? Because organic residues, like dried poop or waste film, create a protective barrier around microbes and odor molecules. If you skip this step and go straight to disinfecting, you’re just masking the smell temporarily. Thorough cleaning exposes the bacteria and odor compounds, making disinfectants more effective at killing microbes and breaking down organic matter. Additionally, drying all parts completely prevents residual moisture, which microbes love, from creating a breeding ground for new odors. This comprehensive approach ensures your deep cleaning effort results in a genuinely fresh and odor-free pail, rather than a temporary cover-up.
As an affiliate, we earn on qualifying purchases.
Match your treatment to the problem — what actually works
Not all cleaning agents are created equal. To truly eliminate set-in odors, you need the right approach for the stubborn residue. Here’s a quick comparison:
| Solution | What It Does | Best For |
|---|---|---|
| Dish soap | Removes grease, organic film, and loose debris | |
| Enzyme cleaner | Breaks down waste proteins and organic matter | |
| White vinegar | Helps dissolve mineral deposits, some odors | |
| Baking soda | Absorbs airborne odors, not embedded residue | |
| Activated carbon | Adsorbs odor molecules | |
| EPA-registered disinfectant | Reduces microbes, disinfects surfaces |
Choosing the right cleaning agent matters because each has a different role in odor control. Enzyme cleaners, for example, are particularly effective on stubborn organic residues because they actively digest waste proteins and organic compounds that cause lingering smells. Using a disinfectant alone without removing the organic matter is like trying to clean a greasy pan with just water—ineffective over the long term. Activated carbon filters are useful for ongoing odor control but are only as good as their saturation point; once full of odor molecules, they need replacing. Fragrance sprays might temporarily mask odors but don’t address the root cause, which is why thorough cleaning combined with the right treatment yields lasting results. Recognizing the specific problem—whether residual organic matter or microbial buildup—guides you to select the most effective solution, ultimately saving time and effort in the long run.
As an affiliate, we earn on qualifying purchases.
Safety first: chemical precautions you can’t ignore
Cleaning chemicals can be powerful but dangerous if misused. Never mix bleach with acids like vinegar or with ammonia—this releases toxic gases. Always follow the label instructions, wear gloves, and ensure good ventilation.
For example, if you’re using a disinfectant, check for proper dilution, and avoid pouring hot water with bleach unless specified. Keep products out of children’s reach and avoid pouring multiple chemicals into the pail at once.
Why is this important? Because improper chemical use can lead to hazardous fumes, skin irritation, or damage to your pail’s components. For instance, mixing bleach and vinegar produces chlorine gas, which can cause respiratory issues and eye irritation. Using incompatible chemicals can also degrade seals or electronic parts in some pails, leading to leaks or malfunctions. Always read labels carefully—if unsure, test a small area first or consult manufacturer guidelines. Prioritizing safety prevents accidents and ensures your cleaning efforts don’t create new hazards, making your odor control both effective and safe.
As an affiliate, we earn on qualifying purchases.
Dry thoroughly — the secret to lasting odor control
Moisture is the enemy of a fresh-smelling pail. Bacteria and mold love damp environments. After cleaning, always dry the entire unit completely, ideally in moving air or indirect sunlight.
Imagine leaving your pail in a shaded corner with the lid open for a few hours; that’s often enough to dry out residual moisture. Proper drying ensures that no damp spots remain where bacteria or mold can thrive, which could cause odors to reappear even after cleaning. If moisture persists, it can create a breeding ground for microbial growth, undoing your hard work and leading to persistent smells. Ensuring a thorough dry step—using air circulation, sunlight, or wiping with a dry cloth—can make the difference between a temporarily fresh pail and a long-term clean one. Remember, moisture control is crucial because it directly impacts microbial activity and odor persistence. When you prioritize complete drying, you’re actively preventing the reestablishment of odor-causing bacteria and fungi, ensuring your deodorizing efforts last longer.
When to say goodbye — knowing it’s time to replace your pail
Sometimes, cleaning isn’t enough. When odors keep returning, or the plastic is deeply scratched, cracked, or warped, it’s time to replace your pail. For example, if your lid no longer seals tightly, odors slip right back in. Or if mold is embedded in inaccessible areas, cleaning won’t fix it.
Deep scratches and cracks can harbor bacteria and odor compounds that are impossible to remove completely. A worn gasket or filter that no longer seals effectively allows odors to escape, making even the best cleaning efforts futile. In such cases, replacing the entire pail ensures you’re not just masking the problem but eliminating the source. Think of it like replacing worn-out sneakers; sometimes, the damage is beyond repair, and holding on only spreads the smell and bacteria. Investing in a new pail with intact seals and smooth surfaces ultimately saves time and effort, providing a cleaner, healthier environment for your nursery.
A step-by-step deep clean you can do today
Ready to tackle that lingering smell? Here’s a simple, practical method:
- Remove all waste, liners, filters, and detachable parts.
- Wash visible contamination with warm water and mild dish soap.
- Scrub seams, hinges, seals, and contact surfaces with a soft brush.
- Rinse thoroughly to clear soap and debris.
- Apply a safe enzyme cleaner to break down organic waste.
- If desired, spray with a registered disinfectant and follow the contact time.
- Rinse again if necessary, especially around food-contact or child-accessible parts.
- Dry the entire pail in moving air or indirect sunlight.
- Replace worn filters and damaged seals.
- Insert a fresh liner only after everything is fully dry.
This routine ensures residual odor compounds are gone and bacteria can’t hide inside microscopic scratches or seals.
Prevent odors before they start — simple habits that help
Prevention saves you from constant deep cleaning. Imagine this: you scoop poop from a messy diaper, then bag it tightly before placing it in the pail. Regularly empty the pail before it’s packed to the brim. Wipe spills and leaks immediately to prevent residue buildup.
Weekly maintenance helps too: wipe the lid, seals, and contact surfaces. Keep the pail in a cool, dry spot away from direct sun, and use the right-sized liner to prevent leaks or tears.
Replacing filters on schedule and airing out the empty pail between bags also makes a big difference. These small habits create a less hospitable environment for odor molecules and microbes.
By adopting these habits, you’re actively reducing the microbial and organic buildup that causes persistent odors. It’s about creating an environment where bacteria and odor molecules struggle to thrive, which means less deep cleaning and fewer surprises. Over time, these preventive measures can significantly extend the freshness of your diaper pail, saving you effort and frustration.
The science of odor: what’s really happening inside your pail
Odor isn’t just a smell — it’s a complex mix of volatile compounds from waste and microbes. These molecules get trapped in microscopic scratches, porous plastic, and seals, where they slowly release over time. That’s why a clean pail still smells after a day or two.
Plastic ages and scratches, creating tiny pockets that trap odor compounds and microbes. When you deep clean, you remove surface residue, but embedded odors require thorough drying and sometimes replacement of worn seals or filters.
Understanding this helps you see that odor control isn’t just about masking smells but actively removing the source. Proper cleaning and drying disrupt these microscopic reservoirs of smell and microbes, making odor less likely to return.
In essence, odors are stored in the microscopic imperfections of your pail. If these aren’t addressed through deep cleaning and maintenance, they serve as ongoing reservoirs, continually releasing foul smells. Recognizing this helps you appreciate why superficial cleaning isn’t enough and why investing in thorough cleaning, drying, and occasional replacement is crucial to maintaining freshness.
Frequently Asked Questions
Why does the smell return right after I clean the pail?
Residue trapped in seals, hinges, scratches, or filters often causes odors to come back quickly. Regularly replacing worn parts and thoroughly drying every surface helps keep smells away for good.Is vinegar or baking soda better for odor removal?
Vinegar can help dissolve mineral deposits and some odors, but enzyme cleaners are more effective at breaking down organic waste. Baking soda absorbs airborne smells but isn’t a deep cleaner for embedded residue.Can I use bleach to disinfect?
Only if the manufacturer permits it. Follow the label instructions carefully, dilute properly, and avoid mixing bleach with acids or ammonia. Always rinse thoroughly and ventilate well.How often should I deep clean my diaper pail?
Deep clean every few weeks or whenever odors persist, and wipe high-contact areas weekly. Regular maintenance prevents buildup of residue and microbes.Should I replace my pail or just the parts?
Replace the whole pail if it’s deeply scratched, cracked, or moldy beyond cleaning. Usually, replacing filters, gaskets, and liners suffices to keep odors away.Conclusion
Deep cleaning your diaper pail is about more than just freshening the air — it’s about removing the tiny reservoirs of odor that hide in scratches, seals, and seams. When you take the time to scrub, disinfect, and dry thoroughly, you cut off the cycle of smell returning.
Think of your pail as a mini fortress — built with proper care, it keeps odors contained. When it’s time, don’t hesitate to replace worn parts. A clean, dry pail is the best defense for a fresh nursery.
Flea & tick season Picks
flea and tick prevention
As an affiliate, we earn on qualifying purchases.